Wednesday, August 20, 2014

Paint Stripping - The Carriage Starts Giving Feedback

Today was the day. The spirit is upon me.

The paint came off the seat today.

And the carriage began to tell its story.

The whole original plan for restoring the seat was thrown out the window in less than 24 hours.

At some point in her life, she has suffered some sort of calamity!


I tried the heat gun to strip the paint but it turned the paint gooey, so I resorted to chemical stripper.

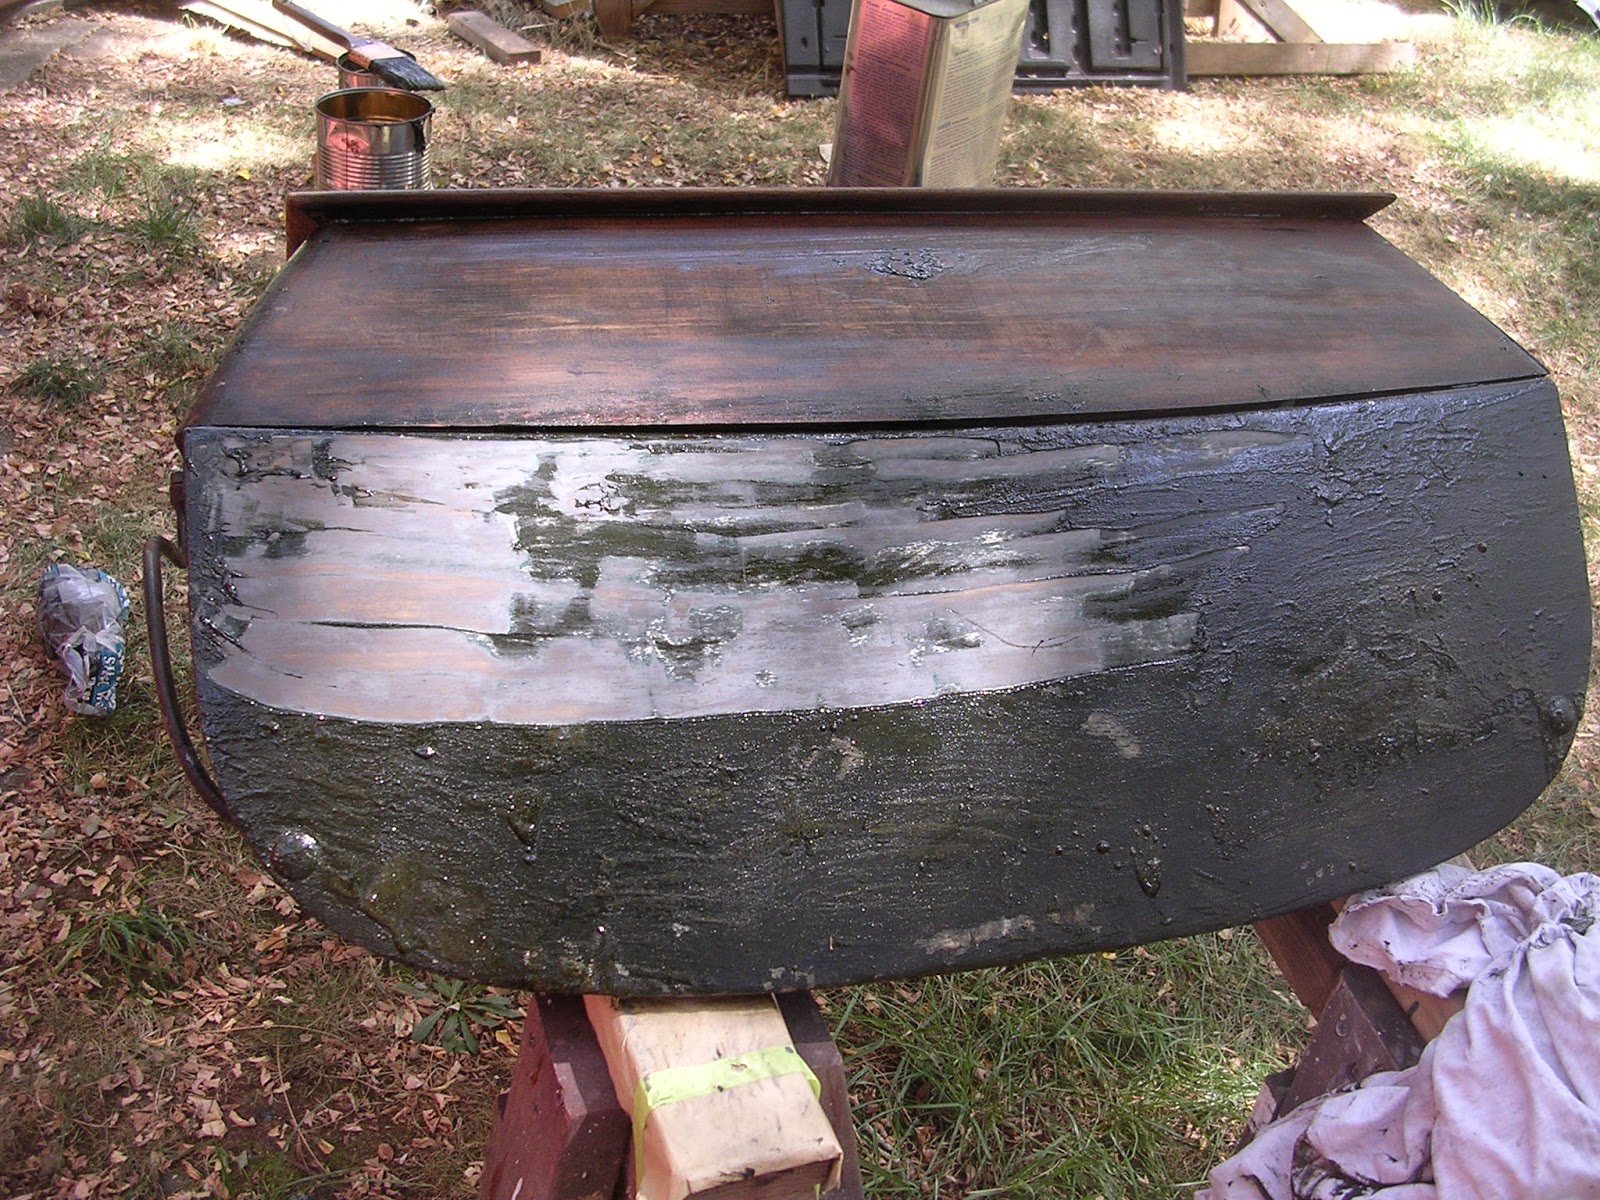
The paint came right off the bottom panel of the seat back (upturned, obviously), but then there wasn't much paint left on it anyway, and it has always looked curiously like Douglas fir, a grainy wood that no carriage builder would typically use for a body or seat panel.

In sharp contrast, the paint on the upper seat back scraped off like tar, and revealed an armor of lead filler over pristine poplar.


The side panels? Also poplar.

The bottom of the seat is framed in oak.

Ah, but do you see that big gap between the lower seat back panel and the side panel?  NOT shrinkage.  A mis-cut!

There was a wooden shim in there.  That piece of wood is not original material.  Several other clues point to the fact that the lower seat panel was replaced with inferior wood, slightly mis-cut and VERY poorly finished.

So now we know that the gap between the upper and lower seat back panels was a pretty-fair-but-not-perfect attempt to match the original arch and angle.  No shrinkage.  It explains why all the fasteners on the inside of the seat are mismatched, why some screw tips peek through the exterior of the wood, even though they're not screwed all the way in. It explains why those corner blocks inside the seat are ratty on the bottom, and yet are painted over.  It explains why one of the wheels has charred felloes from a re-tiring. It explains why there is black paint with red fine lines on the shafts, which are painted red with black lines, under the leathers, and why the shaft ends have been obviously broken off and fitted with tubular steel replacements.

This old girl had a trip to the collision repair shop a long, LONG time ago!

A skilled woodworker might try to re-do that panel.  She is not me.  I have epoxy and I'm not afraid to use it!

Seeing the bare wood has got me all inspired! But it's also got me absolutely panicked about leaving it unprotected!  It had to be stripped before repairs are made, but the repairs will take time. Fortunately, the gorgeous upper seat panel only needs a little chip repair around the upper edge, so I will apply wood sealer to all areas other than the small bits that need attention.


A nice shot of the still-damp seat.  You can see the nail holes along the corner that need attention.  Not so visible is evidence at the back of the side panel that suggests impact.


Before sealing, the lower back panel will receive a coat of this neat stuff, Pettit's "fairing compound", a material for smoothing surfaces on boats.  This will help fill the grainy surface of the fir and make painting easier later on.


And there you have it.  The poplar panels have been sealed with Pettit's Clear Wood Sealer and the grain of the fir panel has been filled (not yet sanded and sealed) with fairing compound.  Safe to proceed with repairs.


Seeing the "new" wood surfaces has motivated me to try to remove this brace, instead of trying to restore around it (have not yet dealt with the paint on the inside of the seat.  I am pointing to a stinking rivet that has to come out.  With that done I can work hastily to clean everything up and protect the surfaces, then the repairs that the seat requires can move ahead at an unhurried pace.

Tuesday, August 19, 2014

Preliminary Evaluation of the Seat

FINALLY after tending to a dozen other urgent projects, including ironing up the new shafts and sealing the wood, (probably the last operation on them for the duration of the coming winter), I am able to have a look at the seat!


The upholstery has been removed and set aside as a pattern.  I am hoping that I can completely finish the seat, so that I can bring it in the house and reupholster it this winter.

These are the only springs present under the upholstery.

The wood is just amazingly well preserved.  There is no appreciable damage to the seat at all.


The seat corners are braced in this manner; an iron strap joins the sides to the back, with this wooden block  nailed to the seat panels, A special type of carriage bolt passes through the side panel and iron strap, and screws fasten the iron strap to the corner block and lower seat back panel.

For the life of me, I do not know why the bottom edges of the corner blocks are so chewed up looking! The wood itself is as hard as iron! There is not a trace of rot.

The decision needs to be made whether to remove these cosmetically unattractive blocks in the seat corners and replace them.

* The corner blocks are SOLID enough to do their job
* If I attempt to remove the fasteners, I run the risk of splitting the panels, which are presently virtually damage free.
*If I attempt to remove the fastener on the side panel, I risk ruining the bolt, which I cannot replace with an identical fastener.
*The corner block will be covered entirely with upholstery.
*The corner block needs only to have its nails replaced to return to its original function.

I am not going to replace the corner blocks, only re-nail them and treat the iron straps for rust.  Of course this is a preliminary decision. If I can extract the two screws in the iron strap without force, and leave the bolt in place, I'll see what can be done about the corner blocks.

This is a view of the seat back.  While it is not pronounced in the photo, a slight gap has developed between the upper and lower halves of the seat back.  I have been thinking about this for weeks trying to decide how to proceed.  In the second photo of this post (the inside of the seat showing the springs), you can see that the upper and lower halves of the seat back are attached with vertical wooden ribs.  Once again, I am considering whether dismantling the seat is worth the potential for damage or wood movement (warping) when the seat back is freed from its restraints.  I tried all the fasteners, and every one of them moved freely.  The fasteners are all in remarkably good condition.


I've placed a slim bamboo paint stir stick in the gap and it doesn't slide in very far.  There is something of an optical illusion going on with this gap, which seemed to make the lower panel appear to bow out...or the top bow in...but checking vertically with a straight edge showed that there really isn't any displacement of the wood, just a slim gap that ought to be about 1/8" slimmer.

I am going to want to glue a wedge-shaped shim into this gap.  But I need to get in there and clean that lower surface to receive the glue.  Should I risk dismantling this nearly perfect seat?


Aha! I am able to slip a super thin steel putty knife wrapped in 100 grit sandpaper right through the gap, grab both ends of the blade and clean the old dirt and finish right off.

There are a few minor edge cracks that will "heal" with a bit of architectural putty, but of course the seat must first be stripped of its old finish.

All decisions at this point are preliminary, and could well be influenced by input from the experienced.


12/10/15 UPDATE...Everything about this preliminary evaluation proved to be WRONG...


Friday, August 15, 2014

Brush Painting the Second Coat of Enamel

Keeping in mind that this is still a paint brush trial, I would have to say that the Redtree brand badger hair paint brush performed very well. It shed a total of one bristle in six coats of paint.

Now I'm not so sure I'm happy with the paint.

But since the badger hair brush performed very well, and these shafts are not actually a part of the main restoration project, I am going to retire this set of shafts from the blog.

I am nearly ready to begin working on the seat of the Concord wagon.

Saturday, August 9, 2014

Brush Painting the First Coat of Enamel

Up until now, I have been a bit cavalier about the cleanliness of my painting environment.  But with gloss painting about to take place, all that has changed.

This is my paint shack.  In its real life it houses a leaky old truck.  It is a Shelter Logic 10 x 20 fabric building.

Obviously it is sitting on gravel.


For a person with no real painting facilities this shed has proved to be just the ticket!  It has natural ventilation between the roof and the wall.  I stapled up plastic sheeting where the walls meet and cause gaps.  For the floor, we rolled out a new, oversized tarp.  Rolling the edges up blocked the gaps under the walls.  Prior to installing the tarp, I had hosed down the ceiling and walls and allowed the shed to dry.

The makeshift environment is clean, lets in the most perfect natural light, and doesn't become a solar blast furnace like a clear plastic enclosure. The plastic tarp doesn't shed lint.

From now on, during this painting project, the shed is an off-limits zone, to minimize dust and tracking in of dirt.

PAINTING SYSTEM DECISIONS

Having invested hours in the preparation of the surface to be painted, it's time to decide just how posh you want the finish to be.

If you want to do a full coach paint job for restoration competitions, or for your own personal satisfaction, you will probably want to mix some of your undercoat with some of your topcoat and apply a couple of coats of this mix, sanding out brush marks in between coats.  Mr. Ousbey's Coach Painting Guide describes these additional coats.

Mr. Isles' Carriage Restoration book seems satisfied with the work to date, but he goes on to mix his own paints.

I am not blessed with a lot of patience, and I think 15 or 20 hours invested in sanding these shafts is adequate.  I am going straight to enamel.  My carriages are working carriages, subject to bruises and abrasions and so I do my best to create a beautiful finish, but not one that needs to be locked away in a glass case or a trailer, coming out only for shows.

SO LET'S JUST GET ON WITH PAINTING, SHALL WE?

Hang on, for a few more paragraphs!

First of all, this will be a trial with my new Redtree badger hair brush.  It never shed any bristles during priming and I have to forgive it for all the brush marks it left in the primer.  It now seems that I could have saved myself some trouble on that count, which I'll explain momentarily.

Okay.  You have your paint.  You've thoroughly stirred it.  Your brush is lubricated and you're ready to go.  But wait!  Make sure your preparations are complete.

Every time you open a can of paint, dip in a stir stick or a paint brush, you risk introducing contaminants.  It's hard enough to keep contaminants OFF the surface without mixing them in!

For that reason, I like to buy my paint in quart cans, not gallons.  I buy some empty paint cans (Home Depot has them), and I strain some paint from the main can into the empty one, using a paint strainer like this one.  You can also use the toe of old pantyhose, etc.

Have on hand a clean tack cloth, and you might want to consider a dropper bottle of paint solvent as I've mentioned earlier, for maintaining the wet edge on the brush.


And there's one more thing you may want to consider; this paint additive, "Penetrol".  Penetrol seems to have great favor with brush painters, and though I've tried it before and been unsure of my results, the opinion of superior painters led me to add two ounces of Penetrol to my pint of strained enamel.

I know Penetrol to be compatible with Pettit, Rustoleum and Schwartz paints.


So the shafts have been drying for 24 yours since wet sanding, and have been moved into the paint shed.  Everything is room temperature, the outside temp is 65 degrees, probably 70 degrees in the shed, just right.

Immediately before painting the surface of the shafts is dusted off gently with the tack cloth.

The whole trick of enamel painting seems to be getting just enough on for good coverage without trying for the whole coachpaint effect on the first coat!  Keeping a "wet edge" on the brush by lubricating it with a few drops of solvent every time it started to drag seemed to be the key for me!  Before, when the paint strokes began refusing to blend together, I was always trying to wet the edge of the brush with more paint.  The results were pretty hopeless.

I noticed that the longer I worked, the more the brush needed a few drops of solvent.


The results:  NO brush marks in the first coat of enamel.

I can still see lots of little sanding marks.  The next step will be to take the shafts out of the shed for another round of wet sanding with 400 grit paper.  I will give them a couple of days to dry as it takes enamel forever to harden enough for further sanding.

Oh and needless to say, my Redtree badger hair brush and I have become old friends!

I am VERY happy with Penetrol, and as a last note...

Penetrol can be used in the primer coats to help eliminate brush strokes.  So late we get so smart.

I still have to paint the singletree.  I'll give the Penetrol a try on it

IMPORTANT LATE NOTE!

I have just added two ounces of Penetrol to a pint of Schwartz sanding primer and applied it to the singletree.  The primer went on like HONEY!  Next time, however, I think I'll try an ounce to a pint as two ounces might be just a little too much.  Awesome stuff!.


Wednesday, August 6, 2014

Getting Brush Strokes Out of the Primer Coat

I've made a major change-horses-in-midstream decision.  While I still intend to apply the color coats with a brush, I am going to switch to applying primer coats with a paint gun.  There is no job on earth more thankless than trying to sand brush marks off the spokes of a wheel near the hub.

I still have not started working on the carriage (although I'm very near starting on its shafts) and am still working on a separate set of shafts.  The amount of sanding required to sand out the brush marks has been gruelling.  I have a special primer gun and all the equipment necessary to spray, and I can spray two coats per day of primer.  The amount of time spent cleaning the gun will be more than offset in sanding time saved.

So this will probably be my last post on preparing a surface for painting by applying primer coats with a paint brush, so I wanted to give a quick overview of the steps leading up to sanding out the brush strokes in the primer.

Once again I have to back way up.  Whenever you prepare to paint your carriage, you have to select products that you KNOW will be compatible with one another.  For brush painting, I am using alkyd type enamels that are formulated for marine use.  These paints seem to be sympathetic to the differences in materials found in a carriage, i.e. wood and iron or steel, solidly bound together.

Anything with lacquer thinner or acetone in it would destroy my finish, therefore, enamels and lacquers are not compatible.  Rustoleum and Krylon are not compatible.

So far I have got three different brands of materials on this set of shafts:  Pettit Clear Wood SealerPettit Yacht White Undercoater, Schwartz* sandable primer, and some Rustoleum rattle-can metal primer. I knew beforehand that all these materials are compatible.

There is one coat of clear wood sealer on the wood, two coats of Yacht White Undercoater, which were sanded almost completely away, for filling grain and small imperfections, and four coats of Schwartz sandable primer.  The primer was applied with the good quality badger hair brush.

There were many brush marks left in the primer.  YOU CAN NOT PAINT THE BRUSH MARKS OUT WITH YOUR TOP COAT.  Before you begin the process of applying your color coats, the underlying surface must be made absolutely smooth.  So we need to get those brush marks out and here is how it's done.

You need:


220 Grit "wet" sandpaper
Some 180 grit wet sandpaper would be good too. 180 grit is coarser and could be used to take some of the initial brush strokes out, but should be used with care.
A bar of hand soap
Some assorted sanding blocks
A bucket of water...
Rub some of the soap into the bucket of water.


A large bucket of clean water
A large sponge
A clean chamois skin (NOT used on waxed cars!)

A nice day, some shade and a comfortable stool would be good, too!


As the last coat of primer was drying I applied a "guide" coat of a rattle can contrasting color (compatible Rustoleum). It is just a quick fog of spray over the primer.

The more traditional way to apply a guide coat is to thin some paint of contrasting color to about the consistency of ink and brush it onto the primer.

The purpose of the guide coat is to show you when you have sanded to a smooth surface and to warn you not to go any deeper.  As you sand away with the wet sandpaper, the guide coat will remain in the depressions.  When your surface is smooth, all the guide coat will have been sanded away.

You must be very careful not to sand all the way to wood!  This is so easy to do, and is the reason for many coats of heavy bodied primer.  Especially touchy places are around corners and sharp edges.

I have also found that if the first two coats of primer (or rough stuff) are a contrasting color to the following coats, it will tell you to STOP sanding before you get all the way to wood.  On these shafts, the "rough stuff," the Yacht white undercoater, is white and the primer dark gray.  The guide coat is also white.

So get comfortable and begin by adding a little hand soap to your small bucket of water.  This lubricates the sand paper and makes things a little easier.  Alternately, you can rub the sandpaper over the bar of soap.

Dip your sandpaper, wrapped around your sanding block of choice, into the soapy water and start sanding!


As you sand, fill up your big sponge with clean water from the big bucket and dribble it onto the area you are working on.  This washes the sanding sludge away and makes sure you do not lose sight of the all important guide coat!

The chamois skin is used to help wipe away sludge and dry the surface.


This is how your progress will look. On the far right, the guide coat has been entirely sanded away.  .

On the left hand side, just a little of the guide coat has been sanded away, so that you can see how it lays in the depressions.  When all the white speckles are sanded away, your surface will be smooth, and just about ready for enamel.


Sanding through to the wood is almost inevitable, but try your best not to!  I have several small spots that went through to wood.  I'll touch them up with (compatible) Rustoleum rattle can sanding primer, then CAREFULLY blend them back with some finer grit (probably 400) sandpaper.  You can apply several coats of the Rustoleum primer within an hour.

I sanded on this set of draft sized shafts for probably four hours and got about 2/3 of the job done.  This is when I made my decision to switch to priming with the paint gun.

I will have MANY more posts to come on painting!

___________________________________

*Schwartz Mfg. LLC
1261 W.200 S
Berne, IN 46711-9779

Schwartz Mfg. an Amish manufacturer of "Carriage Paint".  Their black enamel is the shiniest, blackest paint I've ever seen and I REALLY like their sanding primer.


Tuesday, August 5, 2014

Extracting Frozen Wood Screws


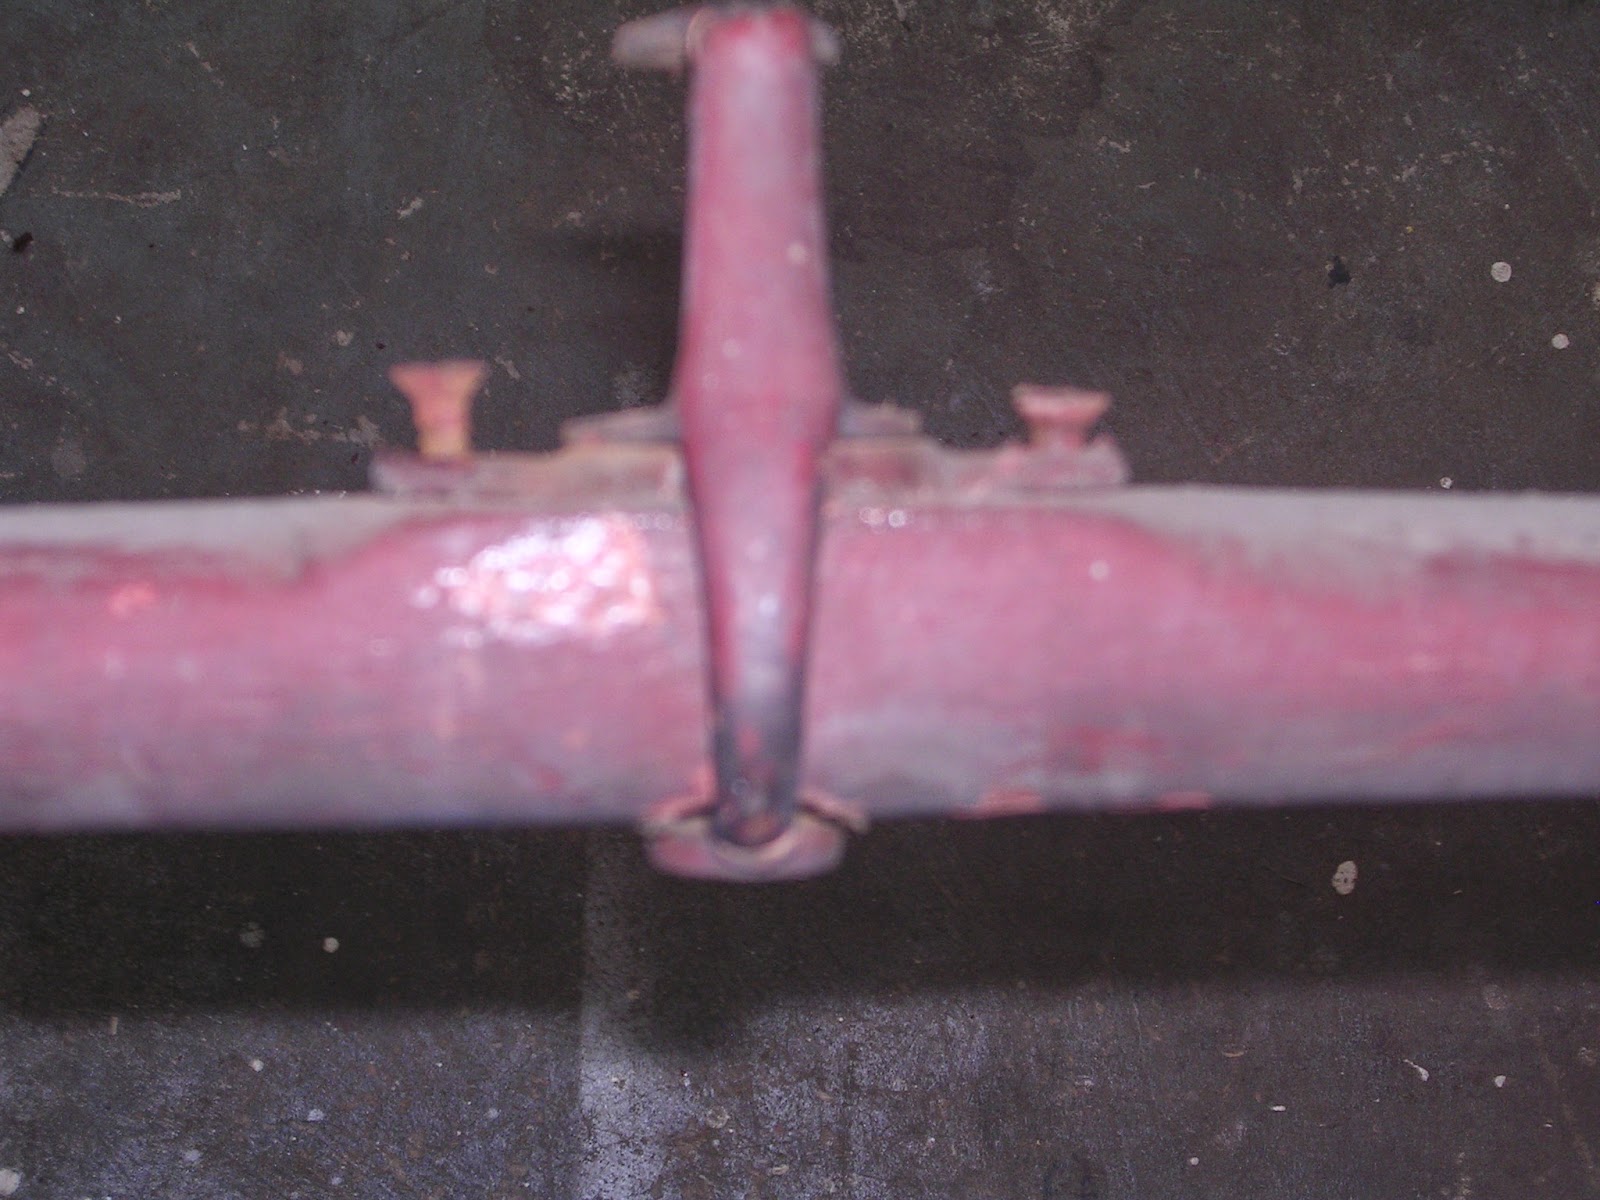
Previously, I talked about removing some hardware from the crossbar of a set of shafts. This singletree yoke was held to the wood with two small (roughly #8 x 3/4")  wood screws which were solidly frozen and would not turn with an ordinary screwdriver.


 Heat is commonly applied to frozen screws to loosen them. For this job, I used an industrial propane soldering iron.  I believe that an ordinary soldering iron can also be applied to the head of the screw to heat it.

We had this tool on hand, so I used it, assuming it would become hotter and work more quickly.  For these small screws it took only about a minute of applying the tip of the soldering iron to the screw head to loosen the screws and extract them easily, as shown above.


At this time, I wish to remove the seat from the carriage body in order to begin preliminary repairs that will benefit from the warm dry weather for curing.  I am now presented with a much more difficult problem; extracting seven very large, very long,solidly frozen screws which hold the seat to the body.  I have been worried that applying heat to the heads of such long, large screws would not be successful.  However, as it turns out, the application of a cherry-red-hot soldering iron tip to THREE of the screws was sufficient to loosen and extract them.  The remaining four would not budge.

I held the soldering iron tip to the screw head for up to four minutes, as the surrounding paint began to blister.  But a cold water quench - another suggestion for loosening screws - did not even cause the screw heads to sizzle. I tried inserting the screwdriver into the slot and striking the handle with a hammer, another suggestion for dislodging frozen screws.  Nothing happened.


My husband suggested the use of a very fine tipped acetylene torch.  This tiny torch is wickedly hot!  A large washer was placed on the wood surrounding the screw head to hopefully help protect the wood from the flame. Holding the pinpoint flame over the screw head for a very short time (on account of the wood).

The torch was sufficient to loosen ONE screw without scorching the wood.  Three remained solidly frozen.


Our last assault on the remaining screws involved this tool.  It is a "hand impact screwdriver" that is capable of converting a hammer blow to 200 foot pounds of torque.  The bit is driven down into the slot while creating a twisting action.

Eventually, two more screws gave way to this tool.

The last one required the application of the torch AND the impact screwdriver to break free, but it, too, was extracted without damage to the screw or the wood.


The screws were even larger and longer than I expected; 1/4" in diameter and 2" long.  I have no idea why the maker was so worried about the seat flying off!


But eventually it did! And now the seat is ready to have the upholstery removed and begin the repair processes that are best done as early in the restoration as possible.

PLEASE NOTE:  The use of a hand impact screwdriver to loosen screws in more fragile panels might carry the risk of splitting the panel.  These screws held rock hard oak framing members together.  I believed the use of the screwdriver would cause less damage than the prospect of gouging the wood out and trying to extract the screws with a pair of vise-grips!

So, if you're faced with the prospect of removing rusted, frozen wood screws, try:

  • Applying heat to the screw head.
  • Apply a cold water quench after heating.
  • Insert a screwdriver into the slot and rapping the handle with a hammer.
  • Try a hand impact screwdriver.  They are not very expensive.
  • Drill a series of holes in the wood surrounding the screw head and chip the wood out around the screw.  Repair the wood later by gluing a piece of dowel into the damaged wood.
Any other suggestions are welcomed.  This is a common and serious obstacle encountered in carriage restoration.


Friday, August 1, 2014

Paint Brushes and Primers

This entry is primarily about paint brushes, not about actual painting or preparation for painting. I am testing a couple of new paint brushes I bought.

I am going to brush paint this carriage.  This is one of those decisions that may change.  Although I have several good HVLP paint guns, my results with spray painting are "uniformly variable",as Mark Twain would say.  This may be due in large part to my relative inexperience, but it could also be due to the fact that I am using fairly "old fashioned" paints that while they can be made to spray, are primarily designed for brushing.

My understanding is that paint formulations are changing almost daily as laws and regulations change.  Some paints seem to want to come out of a paint gun like Silly String.  I can never get a truly deep shine using the gun, except randomly.  But if I do things really well, I can usually come up with a brilliant shine by brushing.

That doesn't mean I'm any better with a paint brush, but having learned a few things along the way, I think I may be a little more successful with a brush.

Two books that are of assistance in learning about brush painting are:  The Restoration of Carriages by George Isles, Curator of the carriage collection from 1950 through 1980, The Museums at Stony Brook.  Published by J.A. Allen, London, ISBN 0-85131-366-3.  I think this book is out of print.

The other book is: Conservation and Restoration of Horse-Drawn Vehicles, by the Carriage Museum of America , ISBN 1-800499-05-3

Mr.Isles selects a camel hair brush for painting carriages.  I once went to a craft store and bought an artist's camel hair brush.  The brush turned out to be very poor quality and shed bristles badly.

In studying up for the latest project, I learned of badger hair brushes.  Following that lead, I found this brush at Jamestown Distributors , my go-to source for many refinishing products.  They are Redtree "badger hair" brushes, actually a China bristle brush, with this description: Slim badger hair brushes feature Redtree badger style China bristle, and are slightly thinner than standard badger hair paint brushes. These slimmer brushes are excellent for Varnish and all marine finish. Badger brushes have a brushy appearance as the hair is cone shaped, thick near the tip and thin near the root.
Badger hair is somewhat stiff even in longer lengths. Most badger-hair brushes have a fan or round shape with a flat top for blending.

So these are the brushes I will be trialing for this blog entry.

As a further note, the more I read, the more references I see to "badger hair" brushes.  For instance, the Conservation and Restoration book recommends the Corona 16055 brush.  I'll have to try this one too.

This project is not related to the Concord wagon, but is a set of shafts for my last restoration.  They are all new construction and have been acquired to allow me to drive a much larger horse to the vehicle than the original shafts.

I may as well paint them while I'm waiting for additional parts for the Concord's shafts.

PLEASE NOTE:  These shafts have received HOURS of preliiminary surface preparation, at least 12 hours alone in sanding!  The raw wood was first sanded, received a coat of sealer, sanded, a coat of "rough stuff", sanded, another coat of "rough stuff", and sanded assiduously until nearly down to bare wood all over, to provide the smoothest surface for applying primer and top coat.  Needless to say, I want a paint brush that won't lay down a bunch of brush marks or bristles.  Hopefully the remainder of the sanding will only be to prepare each coat for succeeding coats, and not to take out evidence of the previous application.  If I've chosen good brushes (they got mixed, but mostly good, reviews), the rest of the painting job should go pleasantly.

Conservation and Restoration lists several reasons for pre-soaking the brushes in solvent before painting, so the brushes are hanging in solvent overnight for tomorrow's first assault on the shafts with primer.

Next Day...

Begins with cleaning the surface to be painted.


First I blow off the shafts with compressed air.

(Yes, I'm in a very poor environment for painting, unfortunately it can't be helped.)


Then I clean the surface with a degreaser, to remove any contaminants I may have transferred to the surface with my hands.  You can use paint thinner or naptha or a solvent that is compatible with the paint you are about to apply.


Then I remove bits of dust and lint with a tack cloth.

A tack cloth is a piece of cheesecloth that has been treated with a non-drying varnish, which is slightly sticky, for picking contaminants off a surface which is about to be painted.


The tack cloth is unfolded completely and gently balled up, then lightly rubbed over the surface so as to pick up lint, but not leave sticky residue on the surface you are preparing.

The tack cloth will be good for many uses if you store it in a zip-lock bag.


Now I am ready to try out my new Redtree brand Americana Slim Badger Hair Brush.

But first, let's estabilish some realistic expectations for the brush.

I am about to apply a sandable primer to these shafts.  I've already done a whole lot - hours - worth of preparation to the shafts and I haven't talked about that.  I plan to as the restoration of the carriage proceeds.  These shafts aren't part of the project but present a great opportunity to get some before-hand experience that will help me do a good job on the carriage...maybe you too. This post actually started out to be about the brush only, but then I realized there are too many variables to either blame or applaud the brush for, without a lot of explanation.

You need to use a sandable primer, one that dries hard enough to be sanded, because one of the primary objectives of priming is to achieve a mirror smooth surface to which you will apply your shiny top coats.  You cannot achieve a really beautiful finish without extensive surface preparation.

The sandable primer needs to deliver a lot of solids to the surface, so imperfections can be filled.  The solvent usually dries pretty quickly which doesn't leave a lot of time for the paint to "level" or blend itself into a smooth surface.

So I am going to forgive this brush if it leaves brush marks in the primer coats.  I hope they'll be small though.  Later, when applying the enamel, I expect the PAINT to behave much differently than the PRIMER, and a lot of the brush's performance will be due to my technique!

The main thing I want the brush to do now is not shed bristles!

TIP:


In order for brush strokes to blend smoothly, you must be able to maintain a "wet edge" on the brush.  That is, you do not want the brush to start drying out and dragging across the surface, creating a real mess where your fresh stroke blends into previously applied paint.  I think this is one place that has caused me the most grief with brush painting in the past.  Every time my wet edge starts to dry out, I have always tried to re-wet it with paint.  All this does is create heavy applications of paint that run or sag and STILL don't blend together with previously applied strokes.

When I first learned about -pre-loading the paint brush reservoir with solvent, an idea occurred to me, and it is one that I am still working on, but we all will know more about it by the end of this restoration project.

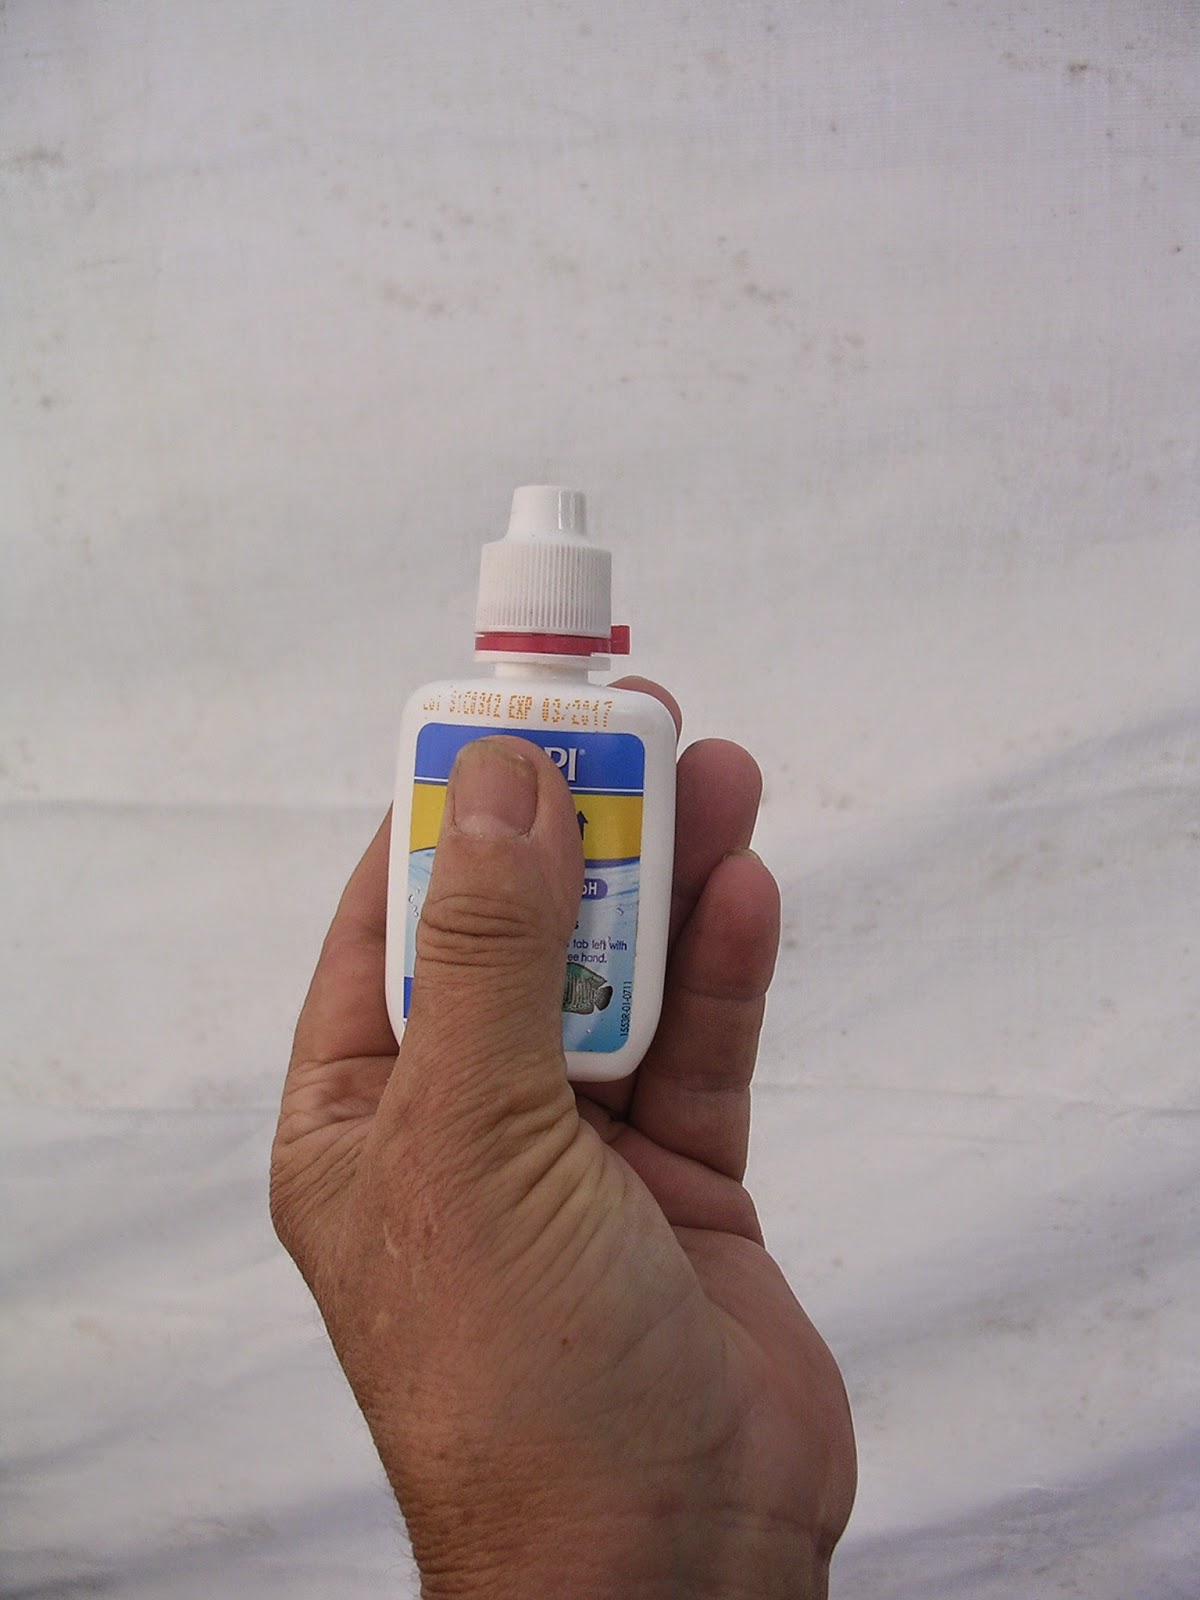
I took this small dropper-bottle and filled it with solvent.  It originally contained a fish aquarium chemical that it doles out in controlled drops, like an eyedropper.

During the course of applying the first coat of primer to the wood, the brush maintained a wet edge throughought the entire first shaft, the cross bar and part way up the second shaft.  Then the brush began to drag.  I applied THREE DROPS of paint thinner to each side of the brush, just below the metal ferrule, a place where there should be no paint.,  The wet edge was instantly restored without making the paint run, and it remained wet for several minutes.  Now that the original reservoir of solvent in the brush had been used up, I found the need for "re-charging" it came pretty frequently.

So, losing the wet edge on the brush is not a fault of the brush.  And you can't expect to restore the wet edge by loading the brush with more paint.  You need to experiment to see what works for you.


The first thing I learned was to shake out some of the solvent before dipping it in paint! Here are some wonderful notes I gleaned off a woodworking forum on the internet (when looking for more information on badger hair brushes):

"Dip the brush in the solvent for the finish and shake it out before dipping it in the actual finish.  This slows down the curing of finish in the hilt of the brush.
"If the finish is a fast-dry evaporating one like laquer or shellac where the cured stuff will re-dissolve in the solvent, continue working on your project until done.  If it's a polymerizing finish like polyurethane or latex paint, clean the brush every 15 minutes or so whether you're finished using it or not [this is where my dropper of solvent came in].
"Once you're done, clean the brush in a couple of washes of the solvent for the finish, shake it out and then - and this is important -, take it to the sink and cover it liberally with hand dishwashing detergent (with no water).  Work this into the brush thoroughly, then wash it in clear warm water until the suds are gone.
"Finally, buy a brush comb (about $3 at Home Despot), comb it out, form it into a chisel shape, and let it air dry.
"Using techniques like this, you'll never have to treat a brush as a throw-away item ever again."

Thank you unknown contributor!


Anyway, pictured above, the shafts have received their first coat of sandable primer.

THE PAINT BRUSH DID NOT SHED A SINGLE BRISTLE.

TIP:

You will know your project is dry enough to recoat if it does not gum up the sandpaper when you are sanding in preparation for re-coating.  If you have recommendations for drying times on your paint can, OBSERVE THEM or reap the consequences, seriously!  Otherwise, pay attention to how the paint sands.  This first coat was "dry as a bone" 24 hours after application.  Some enamel top coats may take 2-4 days to dry sufficiently for re-coating, depending on atmospheric conditions.  If you re-coat a piece that hasn't dried sufficiently to sand easily, expect a crappy re-coat and don't blame the brush!

Next Morning...


A very light going-over with 220 grit dry sandpaper shows,
Oh, yeah, we got brush marks!

But they're pretty fine,despite how awful this picture makes things look!

There are a couple of different ways I can proceed here...one is to sand these brush marks out all the way, which is pretty radical, but some people do it that way.  Feel free, if you love to sand!

The other way is to sand lightly, and apply another coat, aiming to sand out ALL imperfections on the final wet-sanding..

Once again, the object of priming is not to lay up huge quantities of material, but to fill in all the imperfections in the wood to the point where you can sand to a mirror smooth finish without cutting through to the bare wood.  Thick layers of paint like to crack. But during the lightest dusting with 220 grit dry sandpaper, it was clear that any serious sanding would cut right through to bare wood.  So we go to the second coat.

 I am telling you all this because the brush  (perhaps more correctly, the primer) handled differently on the previously primed surface.

The primer just GLOMMED onto the previous coat and the brush lost its wet edge much more quickly.  There were also many fewer drips, with perhaps a slightly heavier application.

In fact, the brush laid down a very nice coat of primer on the second try.  It seemed to level better,but the wet edge evaporated rapidly and frequently!  So the little dropper bottle was kept busy!

Even though brush marks remain, the surface of the shafts is acquiring a sort of "creamy" look to it...the raw look is going away.

And the brush did not shed a single bristle.

BRUSH CARE BETWEEN COATS

I have discovered that keeping a reservoir of solvent in the brush just below the ferrule REALLY makes cleanup easier!

What I've been doing to clean the brush is trickle clean solvent over the bristles until the pigment stops coming out.  When the brush is clean, and I intend to use it again soon, I SUSPEND it in a can of clean solvent, neither touching the sides nor the bottom of the can.

TIP:

Did you know that you can reclaim the solvent you use for cleaning your brush!  You simply set the dirty solvent aside and allow the pigments to settle to the bottom.  Then you can pour off the clean solvent and use it again and again for cleaning your brushes.  Saves money and helps the environment!

My husband gave me this big old metal funnel for cleaning my brushes.  I hold the brush over the funnel while pouring a trickle of clean thinner through the bristles.  I have one jug for dirty thinner and one for clean, reclaimed thinner. The wide funnel is like cleaning the brush over a sink!


When the solids have settled out of the dirty solvent, I pour off the clean solvent into another jug, straining it through a paint strainer.  I'm planning on trying a coffee filter to see if I can strain out finer particles.


PAUSE FOR A LITTLE COMFORTING INFORMATION

I've drug out another source of information on brush painting, "A Coachpainting Guide" by John H. Ousbey, F.R.S.A.  In this booklet, Mr. Ousbey attempts to help us understand the process of coachpainting using modern materials.

This is a tiny little volume that I am sure I obtained from the Carriage Association of America decades ago, but which I see is sadly no longer available from that source. It is "An Ousbey Carriages booklet" published by Ousbey Carriages, Ormond Lodge, Newbold-on-Stour, Stratford-on-Avon, Warwickshire...we presume that is in England, although it doesn't say.  Copyright 1988.

I'll be quite frank.  At the time I bought the book I could not appreciate it because "a lot was lost in the translation."  The materials accessible to me (especially at that pre-internet time) did not go by his terms for materials at all.  For instance, his "primer" is my "clear wood sealer" and his "filler" is my "sandable primer".

Happily, I just found Mr.Ousbey  here .

The comforting passage from the booklet, for the sake of our paint brush, is this:

"Because of the nature of this filler paint (which is basically what we are applying to the shafts at this point) when brushed it is not possible to avoid brushmarks, these are lines in the surface caused by the brush bristles.  However it is possible to minimise them by 'laying-off' each coat in a different direction so that a cross hatching effect results. This in a six-coat system three coats will be vertically laid off and three horizontally laid off, alternatively of course."

So any expectation of our brush producing a flat, smooth surface at this point can be summarily rejected.  We are right on track. (And we can be secretly relieved knowing that there is no Deep Dark Coachpainter's Secret that would have prevented brush marks at this stage!)

And with that I'll move along, since painting the top coat is a whole 'nother story.  I'm happy with the Redtree Badger Hair brush, and using it to apply the primer coats has been a good way to break it in.  We'll see how it does on enamel a few from now!