Saturday, March 21, 2015

A Tale of Carriage Restoration

This post is dedicated to all of you who have a wonderful restoration project at hand, and have suddenly discovered what a monumental task it seems to be!  Take heart!  You can do this!  And here's proof that an ordinary girl with a minimal amount of talent and a few tools can produce a restored carriage that will bring you joy for the rest of your life!

This is the story of a certain Australian "jinker" that found its way to the western shores of the United States.

Now, the term "jinker" is familiar in the state of Victoria (where sometimes it is known as a "Mallee jinker"), but in other parts of the country, such as New South Wales, the vehicle is correctly termed "sulky".  Obviously it has no similarity at all to an American "sulky".  Common to the jinker/sulky vehicle are "Dennett" springs, a comfortable seat which shifts easily with the turn of a small crank (for balance), and a degree of artistry that varies from pretty details to real drama.    This little jinker is in the "pretty details" category, and the wood components of the vehicle, including the "LaTrobe" seat, were available in kit form.

This carriage was in the possession of a lovely lady who had acquired it free, along with another vehicle in much better condition, at an auction.  It was in such bad shape that it was just thrown in with the other vehicle.  Professional restorers scoffed at it (to me, after I acquired it) and it was in danger of becoming a lawn ornament.

During a visit to Victoria at the turn of the 21st century, I was introduced to this lady, and I expressed such great interest in the vehicle that she gave it to me!  All I had to do was figure out how to get it home!

This gift unleashed a flurry of frenzied activity!
We located an exporter in Castlemaine who was actually familiar with exporting carriages, and he directed us to a crating firm in Kangaroo Flats.  We hired a flatbed trailer, and hooked it to the back of Jim Sweeney's ute, shown in the background of this photo.  Jim had already gone to prodigious effort to be at that particular place, at that particular time, and now we had a bit of mad driving to do to meet some unremembered deadline to get it to the packer!

Here we are at the packer, with wheels removed for crating.  But the drama doesn't end here.

We had to CUT THOSE LONG SHAFTS OFF way back at the body and throw them away!

NO WORRIES!  They were junk anyway!

Thus began the 22,000 mile ocean voyage of the little jinker on its way to Long Beach, California, and thence up to Portland, Oregon.

Two months later, the vehicle arrived and reality set in.  The vehicle really WAS  a wreck!  Someone had savaged all the wood work with a sharp instrument, scarring it deeply, all over!
One of the steps was missing, a critical part that also serves as bracing at the front of the vehicle.

This particular photo shows the hand-forged replacement, that came at quite a dear price!

The AXLE was not original, and the WHEELS, were shot, which didn't matter, because they didn't fit the axle anyway!

The wooden mud guards were gone.  The cast treads on the shafts were gone.  The lamp brackets were gone, and CERTAINLY the lamps were gone!  The wooden mud guards were gone.  The seat boards were rotted.

But the spirit of the thing lived on, and I saw absolutely NOTHING on the vehicle that I couldn't fix, or have fixed!

I will not bore you with all the details of the restoration.  I just want you to know that virtually NOTHING is insurmountable in your carriage restoration project!  In this photo, I have lined up a new pair of shafts from Witmer Coach shop with various original parts, such as the "span iron" (the support for the rear transverse spring), the original seat risers (luscious dark wood!) and some other components just to "see".  I later spent hours and hours with hand tools, a spoke shave, a belt sander, and a Sure-Form, putting a crown on the new shafts to match the old, and even carved in the simple scroll at the ends of the shafts to match the originals.

I made new seat boards with a cheap router and more hand tools.  I repaired cracks - some successfully, some not so much.  I had stress cracks in the old ironwork welded up.

I bought it a new roller bearing axle and put a set of freshly tightened wheels on it, that I happened to have on hand.

I bought new mud guards and a singletree from Witmer.


I learned how to upholster from a funky video tape (this is my first button job)


And in a surprisingly short period of time, this was the result!  A thing of beauty and a joy forever!


Today, 12 years later, it's now a bit of an "older restoration" and it shows a little road rash from its new career as a recreational driving vehicle.  It floats over rough ground and rides like a cloud!  And never has there been a suggestion of weakness.

So take heart, fellow carriage restorers!  You too will see the completion of your project and will be able to enjoy the pride of your accomplishment, not to mention HOURS of wonderful driving, for years to come!


Sunday, March 8, 2015

Will I Get to Drive It on my Birthday?

It all depends on whether a handful of stainless steel fasteners arrives by then!


My goodness, it got big all of a sudden!

The wheels are FINALLY fully sanded and sealed, fitted with new leather washers, and slid onto freshly greased axles!

The shafts have been fitted onto the front axle and all the nuts have been tightened securely.  The fifth wheel has been lightly oiled.


The little body came out of storage and got her new floorboards installed, and her freshly re-covered dashboard mounted...


Her "nine cent whip socket" is attached to the dash.  The whip socket was the very first thing on the carriage to be restored.


Her new floorboards are screwed into place...


And the seat is put on!


And happy times...there's enough room on the underside of the seat to mount a pair of lamp brackets!

Just need a few new bolts and screws for the final assembly, and yippee!  One quick spin around the block before it all goes back into storage, awaiting warm weather for painting!

The only thing standing between me and a birthday drive is...when will those fasteners arrive and...yes, this is surely the one thing that will end our gorgeous weather and bring the rain back!


Wednesday, March 4, 2015

Front Axle Assembly

While there is still some sanding to be done on the wheels, the front axle assembly represents the last of the truly filthy cleanup work to be done to the carriage.


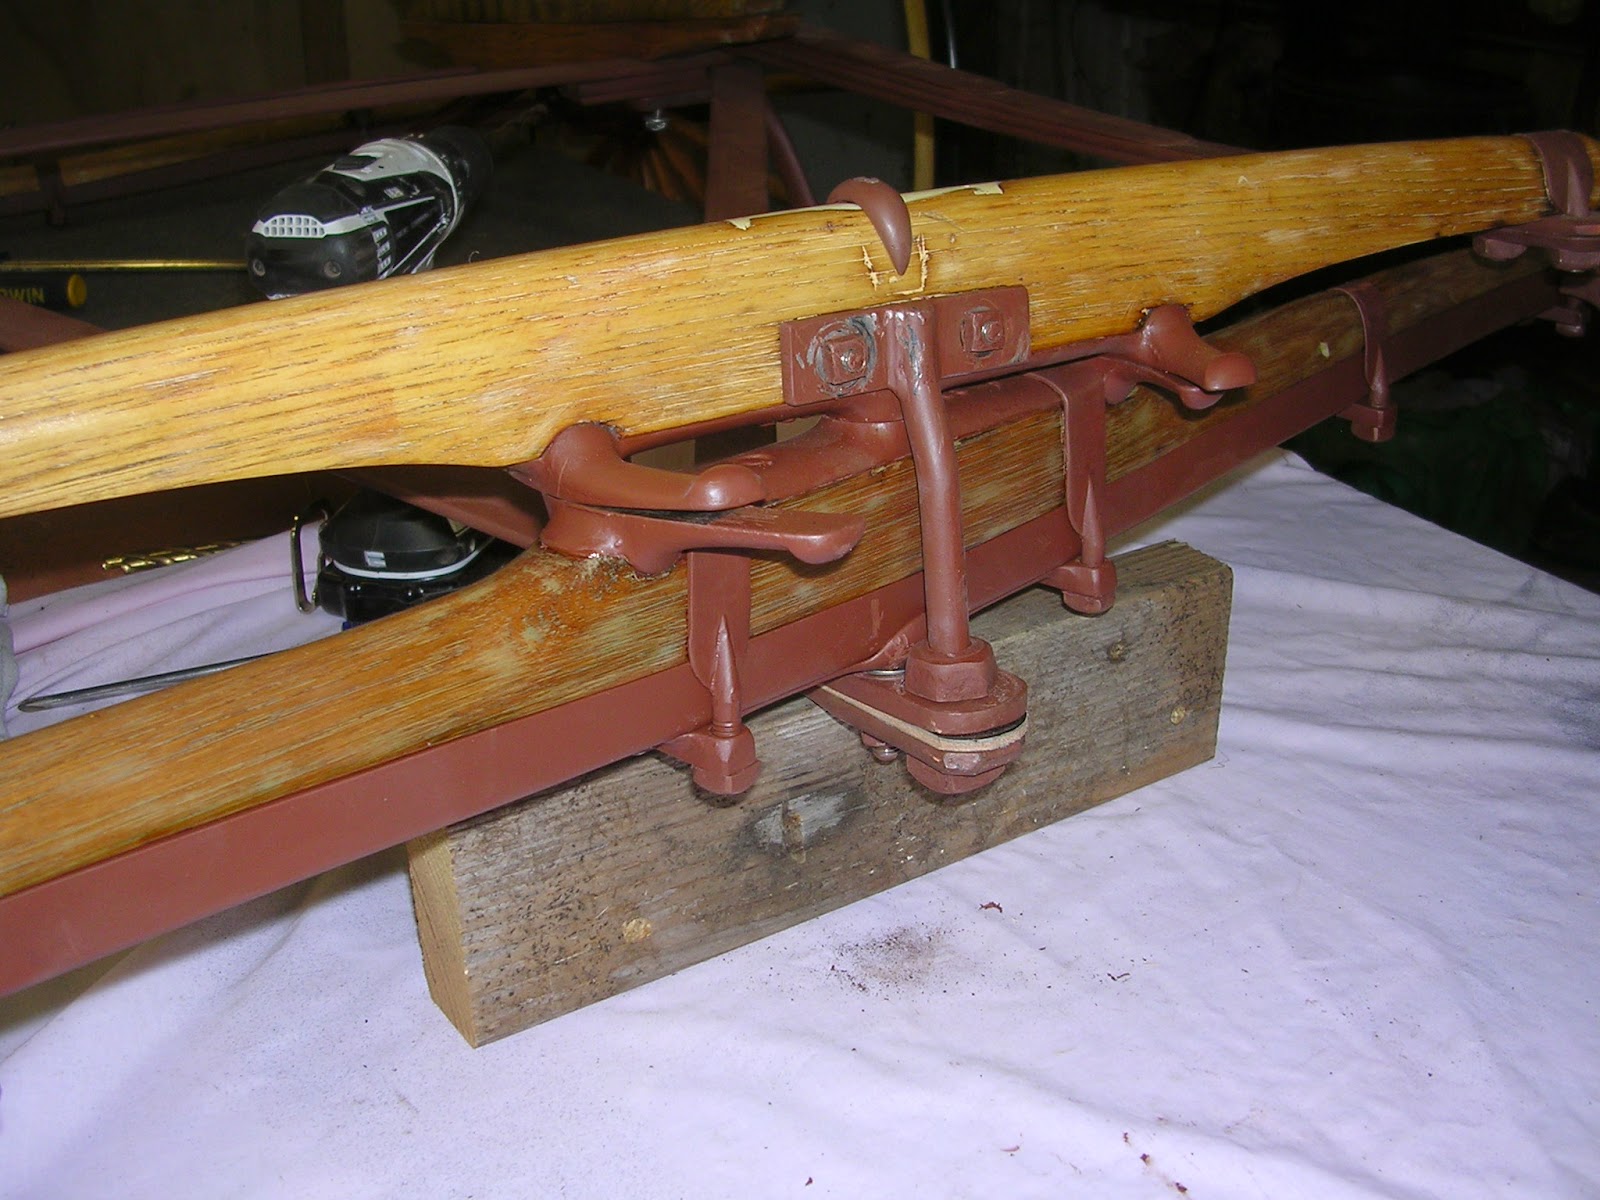
Starting with the spring bar.  I chose to strip the paint off the spring bar with chemical stripper.  I tried the torch, but there was a different sort of primer on the spring bar which resisted heat. And, I was concerned about burning the delicate scroll ends of the spring bar with the torch.


I filled the damage caused by the T-head king bolt with Pettit's EZ-Fair marine epoxy fairing compound.  Look at that lovely wedding ring head on the new king bolt!


Next, everything, including the upper half of the fifth wheel (which is still attached) gets smeared with automotive spot putty. Makes a great grain filler and repairs small nicks.

I chose to leave the upper fifth wheel half attached to the spring bar because it is held on with several screws, all of which would be virtually impossible to extract.  I could not identify a single reason to take it off.


The spot putty dries quickly and sands easily, leaving a surface that should require no further filling prior to painting.  The wood receives a coat of Pettit's Clear Wood Sealer and the metal fifth wheel plate receives a couple of coats of primer.  When dry, the spring bar will be ready to bolt up to the springs.


The two little carriage bolts that hold the perch bolt to the front of the spring bar are extracted, cleaned up, pronounced near perfect condition.


The spring bar is mounted!  Oh! It is NOT attached to the end of the wishbone, just the long springs at each end.


The Front Axle


The very, very, very LAST part of the carriage to be stripped of paint, the axle cap (sometimes called axle bed) held one more little pleasant surprise for me.  Just before I could wipe the paint stripper away completely, the original black paint, with brilliant yellow stripe, was revealed! I had suspected the gear was originally black, here was finally proof.  The evidence of yellow striping was frosting on the cake! This photo shows the last remaining speck of yellow fine lining.

Well, I may be reversing the color scheme, black striping on yellow gear, but  apparently the original owner and I had something of the same taste!


Oookaay, count down! The brown bar in front of the spring bar is the steel axle.  All its parts have been stripped and cleaned in the usual manner.  And yes, Houston Hay made this axle too!


The wooden axle cap (also called axle bed) has been stripped, cleaned, patched, filled, sealed and primed in the usual manner and placed on top of the steel axle, aligning the king bolt holes...


Ironed up...now, WILL IT GO BACK ON?

In order to get it on, I have to elevate the spring bar and push the end of the wishbone down, tip the king bolt sleeve on the axle into the rear hole of the wishbone and hope like heck that the king bolt holes in the spring bar, various pieces of hardware and the axle line up with the holes in the overlapping ends of the wishbone!  I don't for one minute believe I'll get that lucky!


However...it plopped right into place!  Just like that!


And most amazing of all - or perhaps not, given the talent of the blacksmith who did the work - the new perch bolt mated right up with its two mounting holes in the spring bar, and the holes in the ends of the wishbone.

The gear is DONE.


Just to torment myself one last little bit, I fitted the bolsters back onto the springs.  They were BEASTLY to take off, and beastly to get back on...particularly the one at the bottom of the picture.  It is no longer so beastly.  Since they have to come off again for painting, I cleaned up the fit and made them easier to get off and on.


And that, dear friends and fellow carriage enthusiasts, is IT, for the time being. I still have some tweaking and touch up, and two wheels to finish sanding, but nothing blogworthy.

The little carriage is all repaired and stabilized and will go back under a shroud until painting weather.  I hope you'll join me again then!  Thank you all for sharing this adventure with me!


Friday, February 27, 2015

Blacksmith Artistry


If you've been following along, you may remember that there are two special bolts that essentially hold the front axle to the rest of the carriage, which are extremely worn. The general consensus was to replace them, but they are not parts that can be acquired new, from any of the usual sources. In fact, I am guessing that some aspects of the running gear were built AROUND these two special bolts.

In this photo, you can see a vertical "T bolt" that is mounted to the spring bar, passes in front of the axle, then drops down through the ends of the long spring leaves that form a "wishbone"support for the rest of the suspension.  Just looks like a piece of hardware, any old body could fabricate, right?


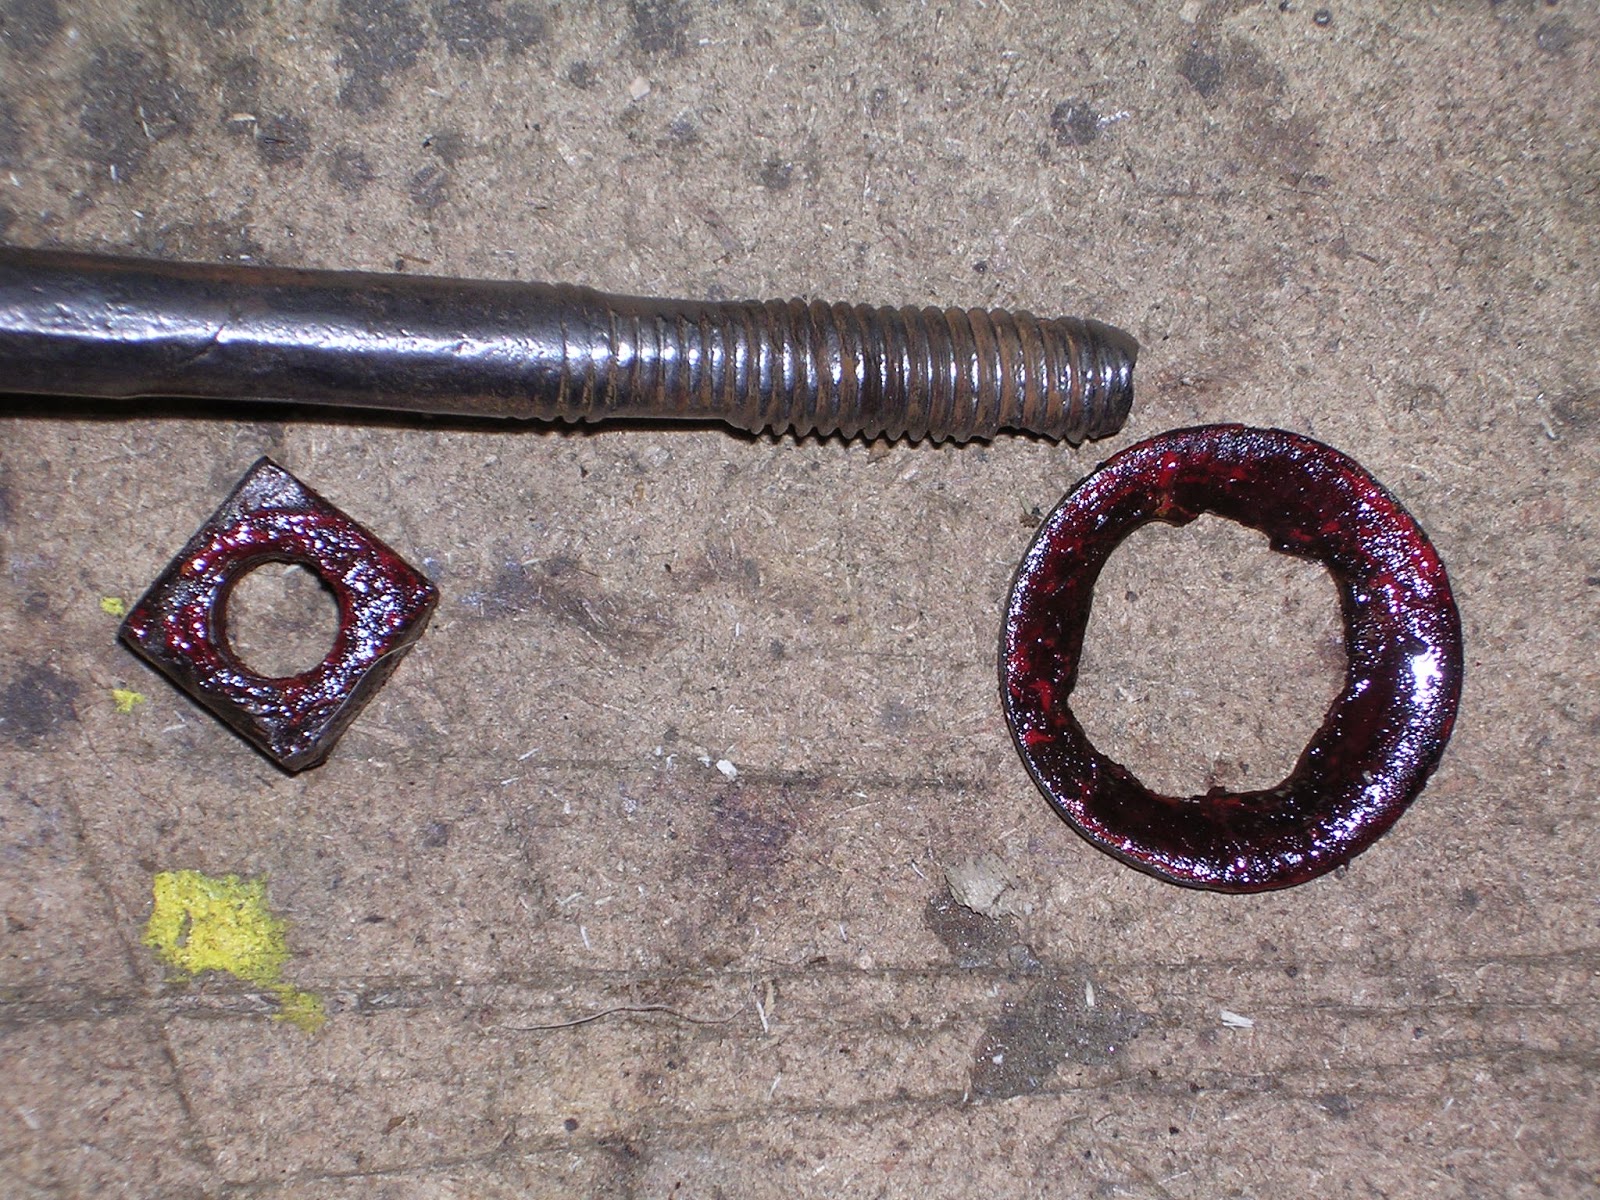
The end of the original bolt was threaded too far up and the action of those two spring ends flexing against the bolt was putting a fairly severe shearing action on the threads. It may last forever, it may not survive one more good shock.

Knowing that this wasn't exactly an ordinary fabrication challenge, this bolt and its mate, the king bolt went to a blacksmith artist to be reproduced.


The new part - I believe it is called a "perch bolt" -has a subtle bend where it joins the mounting plate,and it has a slight "stop" machined in which maintains a loose spacer at a certain height when joined to the axle.

The blacksmith, who had the entire axle for fit purposes, did not thread the bolt up as far, so all the bearing surface will be full diameter stock.


The king bolt, companion to the perch bolt, passes through the spring bar, the front axle, and the "wish bone".  It has two problems. The first problem is the bolt head.  The ends of the "T" bolt head are fitted with prongs that sink into the wood spring bar, supposedly keeping it from turning.  Complete fail. Not only does the bolt turn, but the prongs caused considerable damage to the wood of the spring bar.


And again, the threads run up too high and are subject to the shearing action of the wishbone.


Instead of replicating the old T-head bolt, I asked the blacksmith for another, authentic style of bolt head, a beautiful, difficult to make crowned bolt head...


Which clamps perfectly over the spring bar.

Again, the threads do not go far enough to pass through the wishbone, so the bolt is full dimension stock all the way through its working area.

I feel so fortunate to have this skilled craftsman so close by! And I can also breath a sigh of relief that these critical components are new and safe, as well as visually beautiful.

Now, pretty much the last clean up job is stripping the axle, and reassembling it to the rest of the running gear.  Stay tuned, pictures in a few days!


Monday, February 23, 2015

Stripping Wheels

Back yard carriage restorers have a lot in common with old time gold prospectors...they are willing to put up with untold inconvenience, tearing down mountains of dirt, in anticipation of finding the gem underneath all the crud.

The front axle of the carriage is currently in the hands of a skilled blacksmith, having some very worn parts replicated.  A good opportunity for me to tackle the most unsavory job of all; stripping the wheels. The last of the horrible dirty work before the gem is fully revealed!


The professional work was done last summer.  The wheels are sound, tight, and have new channel and rubber.

All they need is a good cleaning.

Each wheel has 16 elegant wooden spokes, and each spoke essentially has four surfaces. Then of course, there are the felloes/wooden rims.  No matter how you cut it, a set of four filthy wheels to clean up is a daunting task!

Let me say right here and now, that chemical stripping is the awfullest, most toxic, slimy, disgusting process imaginable.  The stuff comes out of the can like the most pernicious snot.  If you try to apply it with a brush, it falls off in globs.  I tried applying it by holding my gloved hand under each spoke and smearing globs of it on with my other gloved hand.  Eventually, the awful stuff made its way through my chemical resistant gloves and fried my hands.  It gets on everything and it BURNS where it touches skin!  Maybe it's just me, I'm probably just sloppy.

But then, when it's done its work, you have to get the awful stuff, now freighted with gluey, sticky paint, OFF. I wiped as much as I could off with paper towels, I scoured the surfaces with a paint brush loaded with solvent. I scraped with a putty knife.  I scrubbed with solvent-soaked steel wool. The paper drop cloth under the project looked like a murder scene out of a B rated vampire movie and smelled like a Superfund site.

And there are FOUR of these devils to strip!!! And after all the horrible toxic mess, you're still left with wheels that need to be thoroughly sanded.

After coming into the house yesterday, totally freaked out by the whole reeking affair, I decided I WOULD return to heat stripping the wheels!  The above photo is a heat-strip in progress, showing the partially stripped spokes, and the cruddy old paint still adhering in areas that haven't beein treated.  PLEASE NOTE THE "MESS" UNDER THE WHEEL!! Half of this wheel is stripped, and there's almost nothing to clean up.


One serious concern with the torch is burning the rubber tire.  This problem was conveniently solved by stretching an old WET cotton sock over the rubber AND the iron channel.  The sock handily drapes perfectly over the curve of the wheel and sticks like a limpet.  I could hit it briefly with the flame of the torch and it hardly even got warm.


Here is a wheel that has been stripped by both chemical and heat means, awaiting a thorough sanding...


And here is the gem lurking under all that crud!  Stripped and sanded, tire taped for painting, just awaiting the glue to dry in pegged, old tire bolt holes, then a coat of clear sealer and wait for painting weather!

Wednesday, February 4, 2015

The Emerging History of H. Hay & Sons, Axle Makers to the Carriage Trade

In my last post, I reported the discovery of a much obliterated maker's stamp on the right rear axle.  It was easy work to make out H. Hay & Sons [5-point star] Coshocton, Ohio.

From this little clue, I was able to date the manufacture of the axle quite definitively in my mind, between 1885 and 1895.

Google and fellow history buffs are now dusting off the legend of the H. Hay & Sons Company, and here is what we have found so far:

From the History of Coshocton County, Ohio, its Past and Present 1740-1881", published by A.A. Graham & Co. Publishers in the year 1881:

HAY, HOUSTON, Coshocton; merchant; of the firm of Hay & Mortley, corner of Second and Main streets; also proprietor of the Coshocton iron and steel works, for the manufacturing of springs and axles; was born, February 4, 1818, in Washington County, Pennsylvania; son of John Hay, who was a native of Ireland.  Young Hay maintained on the farm until ten years of age, when, with his father, he moved to Eldersville, Washington county, Pennsylvania, and remained there three years; then came to this State, and located at Martinsburgh, Knox county, where he lived two years.  In May, 1835, he came to this city, and entered as a clerk in the store of Renfrey & Hay, where he remained ten years.  In 1843, he engaged as a clerk with Hamilton Meek, and remained two years.  In 1845, he was appointed collector of tolls on the Ohio canal, at Roscoe.  In 1852 he became one of the firm of R. & H. Hay.  In 18ty, James S. Wilson was taken into the firm, which continued until June 1879, when the present firm was formed.  The building of this firm, on the corner of Second and Main streets, is forty-five feet by seventy-five feet, three stories and basement and all occupied.  They carry a large and complete stock of dry goods, groceries, boots and shoes, carpets, seeds, etc.  In 1874, Mr. Hay purchased the Coshocton iron and steel works, for the manufacture of springs and axles.  This shop averages forty pairs of springs and 100 axles per day.  Mr. Hay was married, July 1, 1852, to Miss Detia C. Roberts, of Licking county.  The union was blessed with four children, all living, viz: Kate, George A., John H. and Warner.

So we are up to 1874 and Mr. Hay has acquired the Coshocton iron and steel works.  (Please note the lack of capitalization is as found in the original document.)

An anonymous history sleuth gifted me with the following excerpt from the same publication:

 The Coshocton Iron and Steel Works

Since Mr. Hay's connection with the works the quality of the manufactures has established a reputation for them which insures an easy and continued sale wherever they are known. Columbus, Toledo, Cincinnati, Louisville, Chicago and St.
Louis, are the principal shipping points, but the manufactures find their way westward as far as the shores of the Pacific. About ninety workmen are now employed in the works. William Ward has supervision over the works, Farley Connerty is foreman in the foundry, A. D. Howe in the axle department and Horn and Kronenbitter are the contractors in the spring department.

History of Coshocton County, Ohio: Its Past and Present, 1740-1881 ...
by Albert Adams Graham
p.435

Enter son, George.  We obtain this information about son George Alvin Hay from The Centennial History of Coshocton County, Ohio 1909  compiled (I assume) by William J. Bahmer, Clark, S.J. Publishing Co., Chicago. Published by S.J. Clarke Publishing Company.

On page 44, we find George's bio:

George Alvin Hay finds an appropriate place in the history of those men of business and enterprise in Ohio, whose force of character, whose sterling integrity, whose good sense in the management of complicated affairs and marked success in the establishment of industries, have contributed in an eminent degree to the development of the resources of Coshocton.  His name is inseparably interwoven with the commercial and industrial progress of the city and in political service he has done that for his city which has caused him to be designated as one of the best mayors Coshocton has ever had.  He is now the president of the Houston Hay Axle Company and is associated with various other business concerns.

So in 1909 we have the Houston Hay Axle Company, but NOT H. Hay & Sons Axle Company.  Read on...

Mr. Hay is one of Coshocton's native sons, his birth having here occurred November 16, 1855.  His parents were Houston and Delia Cook (Roberts) Hay, the former of whom died March 28, 1900, and the latter February 22, 1896.  After attending the public schools of this city, George A. Hay spent two years as a student in the Denison University at Granville, and then became a junior in Princeton College, where he completed the classical course in 1879, winning the degree of Bachelor of Arts.  Following his return to Coshocton he took up the study of law in the office of Spangler & Pomerene and was admitted to the bar in December, 1881.  He then began the active practice of law, in which he continued for two years with good success, but owing to the fact that the plant which was owned by his father was destroyed by fire, Mr. Hay gave up his law practice to assist his father in rebuilding and remodeling the factory and establishing the business on the basis on which it is now conducted.

So sometime around 1883, The Coshocton Iron and Steel Works burned down, if I understand correctly.

The factory, under the name of Houston Hay  (still not H. Hay & Sons), manufactured carriage, wagon and buggy axles.  In 1885 the firm of Houston Hay & Sons was organized and the business continued under that name until 1895, when it was taken over by the Houston Hay Axle Company.

So there we have it.  The name stamped into the axle was in existence between 1885 and 1895, although it existed under different names before and after that time.

My fellow historian also miraculously located this envelope on eBay, which I promptly purchased.

Note that the return address includes the phrase:
"Horn's Side-Bar Springs"

This could be a wonderful historical clue, because the side bar springs on this carriage seem so unique.  Another fun rabbit hole to run down!  If I find more information, I will post updates.

Monday, February 2, 2015

FINALLY!! A CLUE!!

In the course of grinding away old paint and crud from the rear axle, looking for a maker's mark to identify the orientation of the axle, I came across this on the underside.

The sideways R indicates this is the right side of the axle.

What does "STEEL K." mean?

And then there's the extremely exciting

"H. HAY & SONS [5 point star] COSHO.....O"

My guess is the firm was located in Coshocton, Ohio.

Undoubtedly I'll find similar information on the front axle, hopefully not worn away by an axle clip bar, like this one is.

Pretty darn cool.  While it doesn't tell me who made the carriage or when, it gives me a scrap of information that may lead me to some history of the axle maker, and perhaps a time frame when they were doing business.

This axle is entirely new to me.  It is hand forged, with rounded edges as you see, on the bottom edges.  The axle is wider in the middle and tapers toward each end, which I've never seen.  It is also pleasingly arched.

Other marks found on the axle, left end, again the "STEEL K." and the letter L, which is overlaid on a number.


Back to the right side, a little further inboard, you can barely make out 1/16.


And on the upper surface, right hand side, is stamped 2 0 , perhaps a part number.

It's pretty exciting to find any kind of identification on the carriage.  I am at the end of the line, everything but the front axle has now been cleaned.

I feel it's unlikely that the entire carriage was built in Ohio, I'm sure the axle maker supplied many customers.  But the excitement of finding an actual name anywhere on the vehicle is incomparable.

Now to see if I can bring H. Hay & Sons into the consciousness of the 21st Century!

UPDATE!  HERE IT IS:


County officers in 1888: Auditor, Joseph BURRELL; Clerks, Samuel GAMBLE, Andrew J. HILL; Commissioners, Vincent FERGUSON, Samuel NELDON, Abner McCOY; Prosecuting Attorney, Samuel H. NICHOLS; Probate Judges, Holder BLACKMAN, Wm. R. GAULT; Recorder, Wm. H. COE; Sheriff, James R. MANNER; Surveyor, Samuel M. MOORE; Treasurers, William Walker, Geo. C. RINNER. Newspapers: Coshocton Democrat, Democrat, J. C. FISHER, editor; Age, Republican, J. F. MEEK, editor; Standard, Democrat, BEACH & McCABE, publishers; Wochenblatt, German, Otto CUMMEROW, publisher. Churches: Presbyterian, Methodist, Baptist, Episcopal, and Catholic. Banks: Commercial, Jackson HAY, president, Henry C. HERBIG, cashier; Farmers’, J. P. PECK, president, Samuel IRVINE, cashier.

Manufactures and Employees—Buckeye Planing Mill, 5 hands; Houston A Hay & Sons, axles, springs, etc., 65; Wm. Ferrell, iron castings, 3; Tuscarawas Advertising Co., advertising novelties, 12; Coshocton City Mills, flour, etc., 6; J. F. Williams & Co., flour, etc., 11.—State  Report 1887.