I don't really have any photos of finishing the side panels.
Because there are no buttons (the panels are much too short and the simple job doesn't need them anyway) I applied upholstery materials directly to the panels and finished them in place.
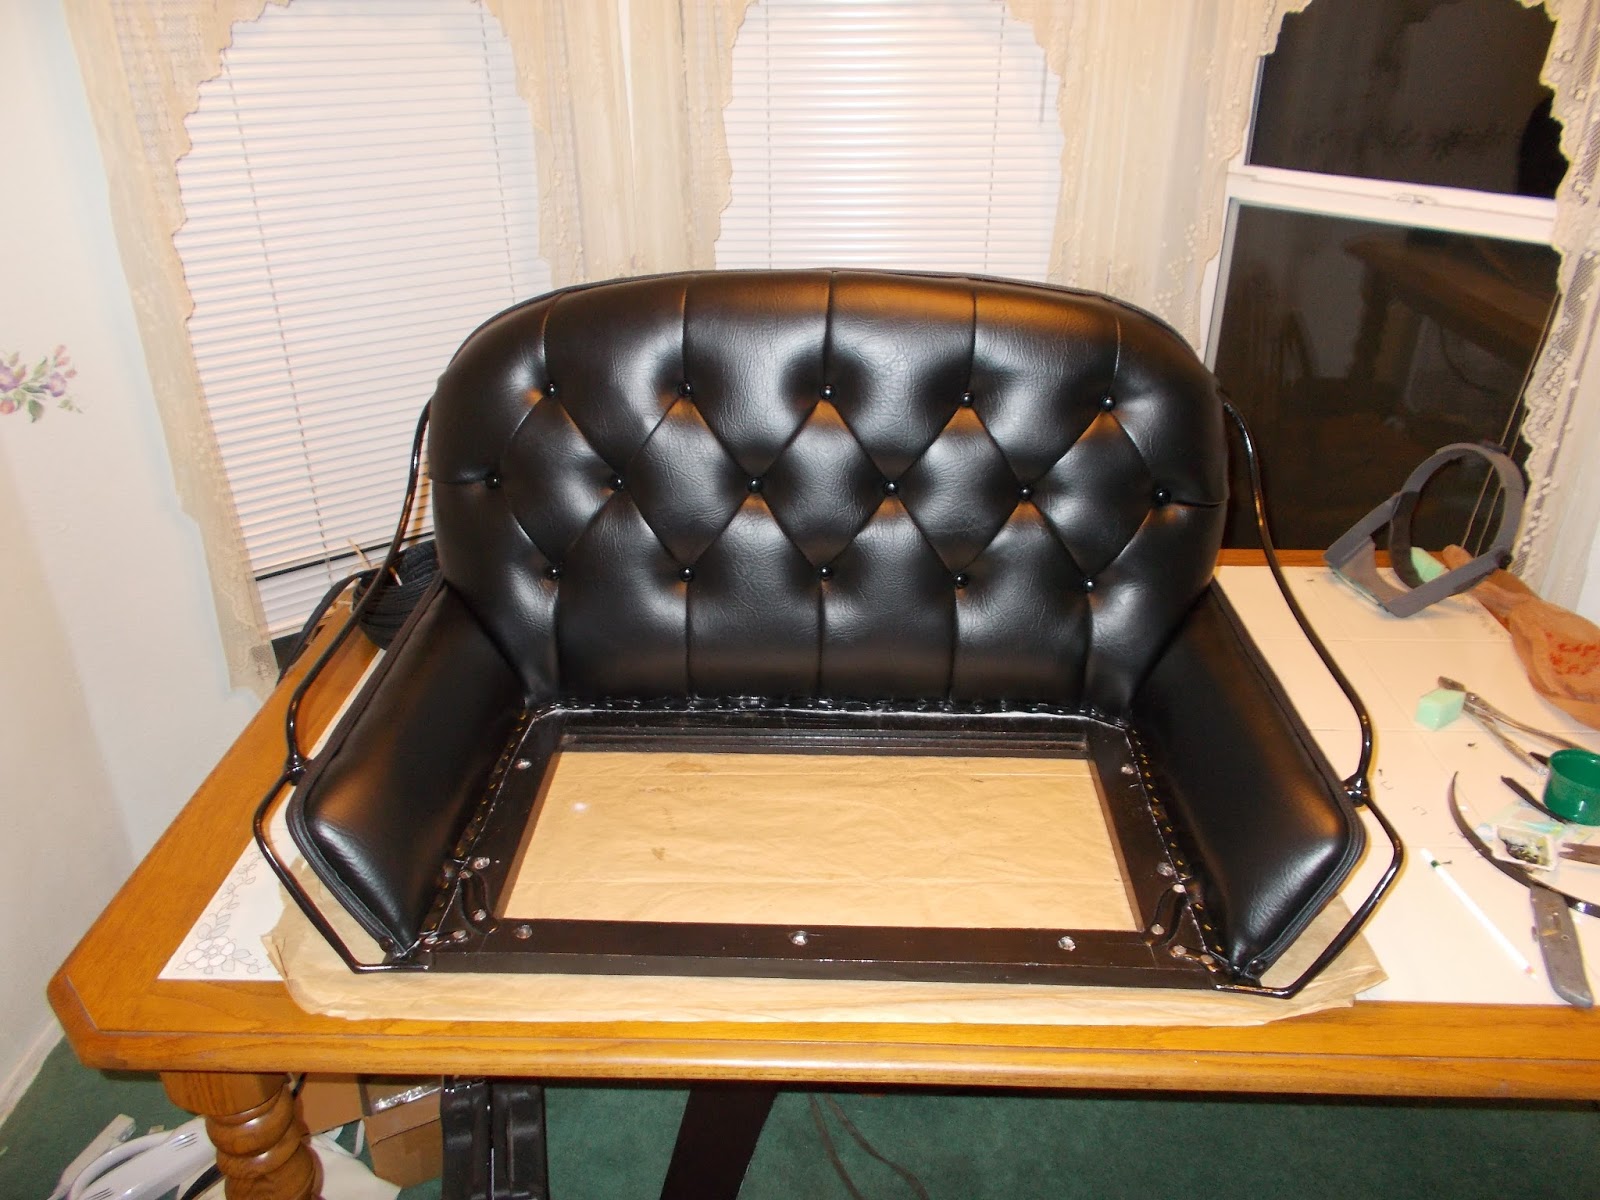
My biggest challenge was to work around this brace. I took this assembly off for restoration and when reinstalling it, I opted for a carriage bolt and nut rather than the rivet, to which I am pointing. I was afraid that if I tried to set another rivet I would split the wood...and besides, I didn't think I could source new, ornamental rivets. The nut on the new bolt sticks out quite a bit, even though I ground some of the thickness off.
Well, don't be shocked. I put some duct tape over the nut to soften the edges.
I needed something firm for a foundation around the hardware - I didn't want to make a big bump in the finished job. So I used some 3/8" thick very dense foam or sponge rubber, ie a camper's sleeping pad! - and cut two pieces, one to fit the panel in front of the iron brace and one to fit behind. The foam was spray glued in place on the panel.
I packed some polyester batting over the top of the brace and...hah! Put a strip of duct tape across everything to hold it in place.
I next cut 1" extra firm foam rubber to fit the entire panel. I actually cut the foam 1" shy of the bottom of the panel, and a little short in back, for fitting, spray-gluing into place over the foundation, and leaving a little sticking out over the edges of the wood. Again, I didn't want excessive bulk to interfere with the bottom cushion. I spray-glued a suitably oversized piece of vinyl onto the foam and stretched and tacked it in place in the same manner as the seat back cover.
The iron brace is invisible under the finished cover.
The vinyl stretched so nicely over the front corner, I didn't have to take a tuck in it. At the back, things are basically hand-fit, folding the raw edge over in a manner that matches up with the back cover. I did a little hand-stuffing around the back. At the bottom, the foam self-formed nicely when stretched tightly and stapled down.
Excess vinyl trimmed to just inside the edge of the wood.
Finishing up - usually some sort of decorative strip is applied to the raw edges of the upholstery to hide the tacks and give the work a finished look. There are several ways to do this.
Probably the most familiar one is a folded piece of "self" (same as the upholstery) material, tacked in place over the raw edges with ornamental tacks.
Another way, if you are using fabric, is to make a similar folded strip of self material and hot-glueing it to the raw edge. I did this on one and it looks really posh.
I am not a big fan of exposed tack heads on the outer edge. That doesn't mean a thing. The original upholstery had exposed tacks. What I used on this project was a pre-made edging called "Hidem Welt". This is probably a product that appeared decades after the vehicle was first made, so is historically inaccurate...sigh...
Hidem Welt is also available from Witmer Coach Shop.
As you can see, the welt is about 3/4" wide, and has two lengthwise beads running down the center.
The strip is placed along the raw edge of the upholstery and tacked or stapled into place, by forcing the beads apart and tacking between them. Then they are smoothed together, to hide the tacks/staples completely.
The biggest problem with Hidem is finishing the ends. I had some real end-finishing problems with this carriage and I didn't do a good enough job to brag about it here. Just giving you options.
Once the raw edges of the material are finished, the job is pretty much done and it's time to make a bottom cushion.
Like all things carriage, there are many different ways to make a bottom cushion.
You can make a completely fabric soft cushion with nice piping around the edges.
YOU can make one...I can't! I have tried and failed to match corners on a properly made soft cushion. I can't do a good job of the welting.
I HAVE upholstered a plywood sheet with a slab of foam on it and a nice fabric cover with a piped seam around the top.
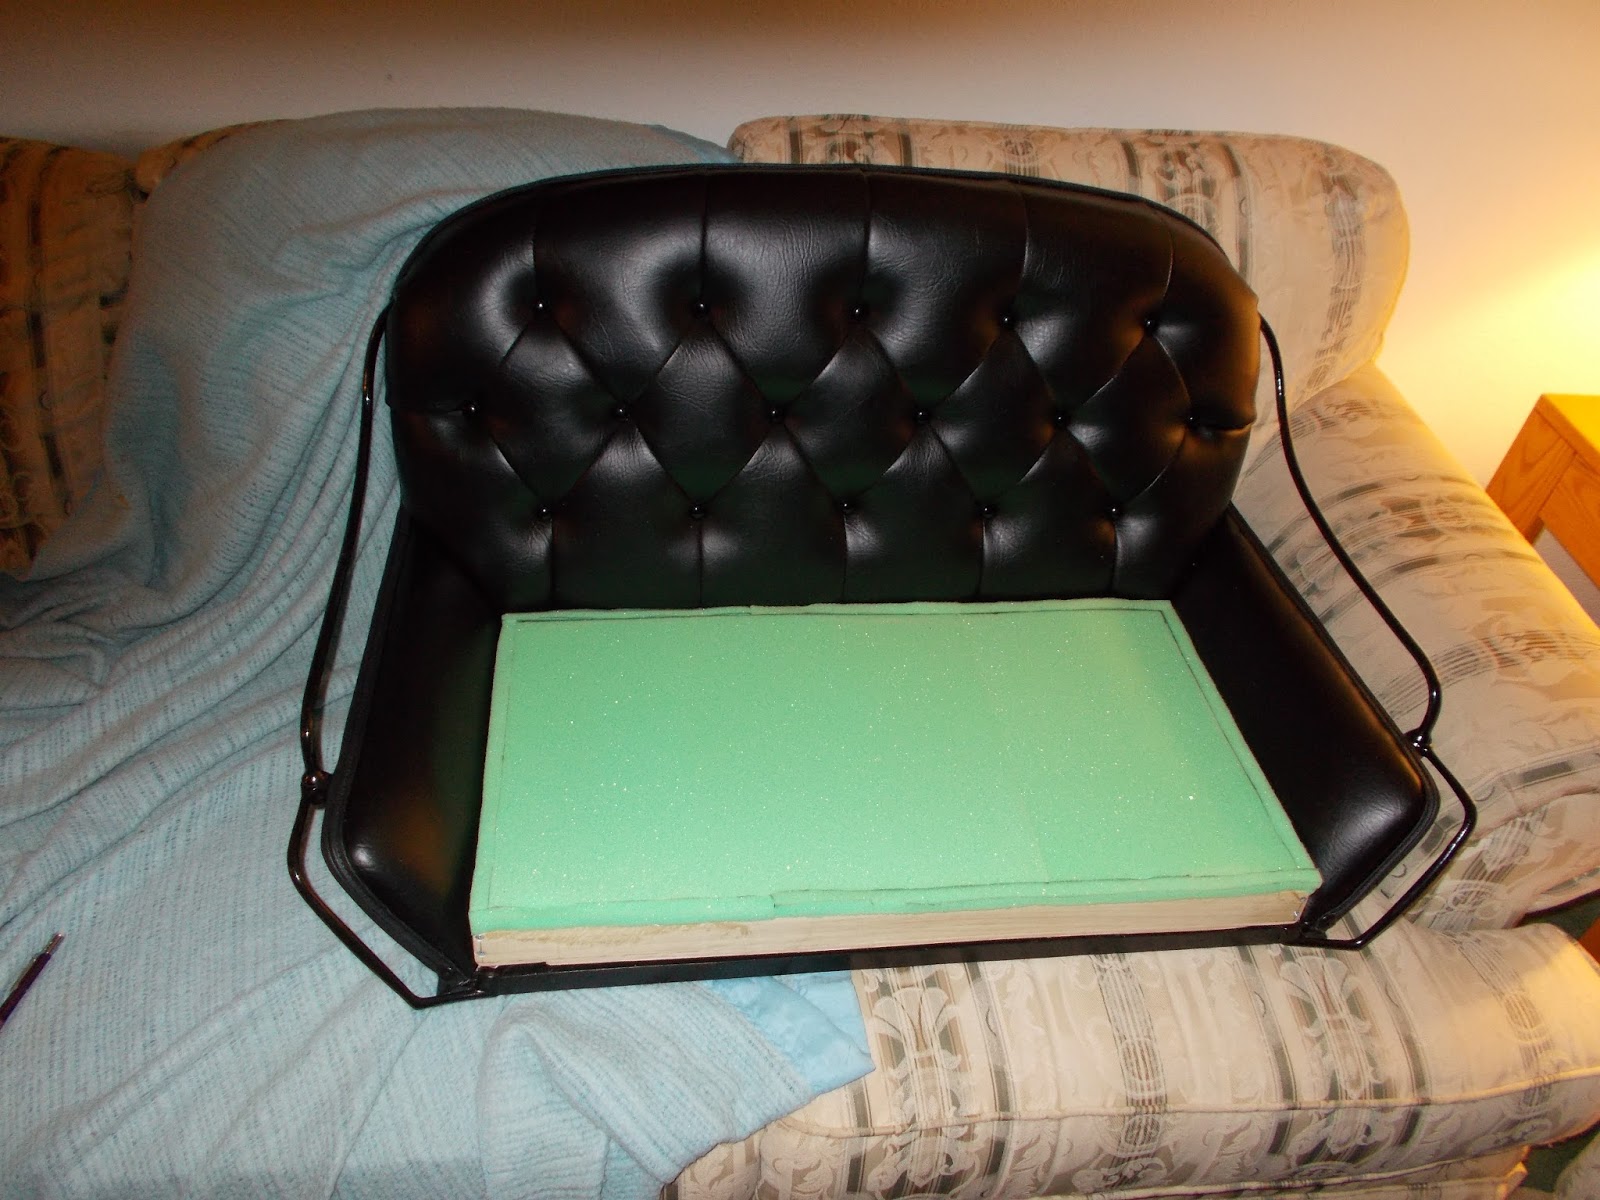
But my favorite way to make a bottom cushion is to upholster a little wooden tray, like this.
When inner springs came into use for carriage cushions, they would likely have been mounted in a wooden frame, so this idea isn't so far fetched. I actually prefer an inner spring cushion, but this tiny little seat just doesn't have the depth to accomodate springs.
Anyway, first up is to make the tray. This tray has a 1/4" thick plywood bottom, and the sides are 1/2" x 1 1/2" poplar, all screwed together with 1" #6 screws. there was some hardware to work around...each seat is different. You can always make cutouts in the tray bottom to fit around the iron...that will actually help hold the cushion in place in actual use.
The tray is a slightly loose fit, probably about 1/2" smaller on the sides and back than the bottom of the seat. Upholstery will quickly gobble up any looseness.
I had actually intended to buy 1/2" x 2" pieces for the sides of the tray, since I am using 2" thick extra firm foam for the cushion foundation. This actually turned out just great...I cut the foam to fit snugly inside the tray, then glued a little 1/2" strip around the top of the frame. This ended up cushioning the edge of the frame (which had been rounded a tiny bit with a sander) perfectly in the finished cushion.
As for the seat back squab, I experimented with a layout for buttons, with channel widths and diamond dimensions the same as those on the seat back cushion.
Once the layout was determined, I cut out a piece of 1" extra firm foam that was, oh, 2" larger all the way around than the tray. Marked my centerlines.
I cut out a piece of vinyl 6" wider all around than the tray, and prepared it just the same as for the seat back cushion.
I wanted to get a little extra loft for the buttons, but did not have a lot of vertical height to play with, and also did not have any of the 1" polyester quilt batting. I ended up glueing a piece of the 3/8" thick super dense camping pad material to the underside of the 1" foam, where it could do double duty, cushioning the edge of the wooden frame. Cotton drill glued to the bottom with spray adhesive.
Buttoning proceeded as for the seat back squab.
I have actually turned the frame upside down on top of the prepared top cushion and cover. You can see I have too much pad, so I trimmed the edges of the foam (with scissors) to just a little overhang...to provide a little bit of "muffin top" around the edges.
Note I have made marks on the sides of the frame, where I want the pleats to match up.
I am actually going to start pulling the cover tight over the bottom of the tray and staple to the underside with removable staples.
The cover is pulled tight and looks deceptively finished but it is not. Anyway, it's nice and uniform for this stage
Stapling in progress. Corners are always fun. I don't have any advice, but I managed to fold the cover at the corners and ended up with little 1/2" tall folds that don't show from the front.
Okay...actually got a picture of it...
At this point I stopped to make up some seam welting (or piping). To do this, I cut a 2" strip of vinyl and folded and sewed it over a piece of cord with my little portable machine, which has a zipper foot. My big industrial machine does not.
I marked a line all the way around the cover, measuring 1 1/2" up from the bottom edge of the tray. This put the line about 1/4" below the upper edge of the frame.
...Like so, again using the white Stabilo pencil.
As per the photo above, the seam line of the welting was lined up exactly with the pencil mark, starting at the center back of the cushion, stretching the welting gently.
At the beginning/ending point of the center back, the welt seam is opened and a bit of cord cut back.
The trimmed end of the welt is lapped over the other end and tacked in place. Nice finish.
Once the welting is tacked into place, I trimmed all the excess cover material flush with the bottom of the frame.
The trimmed cushion. Now we need to make a "skirt" for the sides.
To do this I measured the distance around the frame and made up 6" wide strip of vinyl that would pull very snugly down around the frame.
The ends of the strip are sewn together, to make a big loop, like a giant rubber band.
I have marked a 1" seam allowance all around the top edge of the "skirt". I have pulled the inside-out skirt down around the top of the cushion, matching the seam allowance up with the seam on the welting. The skirt is now tacked or stapled in place.
For the next step, you need some kind of material to use as a "tack strip". It needs to be something with a good, firm edge. Heavy card stock will do, which is what I used. I cut card stock in strips 1 1/2" wide. I butted the long edge up along the seam allowance marked on the skirt and stapled it FIRMLY down, making sure that it was butted up as tightly against the welt seam as possible.
Then I pulled the skirt right-side-out and down over the frame. All that's left to do is pull the skirt down smoothly, fold it under the bottom of the tray and staple/tack in place.
After the cushion skirt was pulled tight and stapled well down, I added a "seat fall". This is a little curtain hanging down from the front of the cushion which is common to most buggies.
I do not have photos of the process but there's not much to it. I measured the carriage so the fall would fit nicely inside the seat risers and simply cut and sewed vinyl in the right dimensions, then tacking in place on the underside of the cushion frame. I finished the bottom of the cushion with a nice piece of vinyl, cut and hemmed to fit.
At the bottom of this seat fall you can see an extra seam. That is there to form a little pocket to slide a metal rod into. This helps weight the bottom of the fall and makes it hang straight. If you are using fabric for the seat fall, you might want to stiffen the material with some iron-on pellon which is a product used in garment making to stiffen collars, etc., and is available in fabric stores.
That's it!
Happy restoration, everyone, this pretty much brings the blog to an end. Thank you for sharing the journey with me!