Saturday, December 6, 2014

Prepping for Paint - Just an Update

The best laid plans of mice and carriage restorers...Things like husband's knee surgery, and a tractor that needed its 30 year old hoses replaced (displacing the carriage body in the shop!), bad weather,and generally tiring of sanding, slowed progress way down on the carriage body!

When last we met, I believe I had brushed a coat of primer over the entire carriage body.

In this photo, the carriage body has received four brushed coats of primer.  Then it was "fogged" with a light coat of rattle-can paint of a contrasting color.  Now the object is to sand the whole bugger down AGAIN, until all that "guide coat" has been sanded off.  At that point, the surface will be essentially flat, and free of brush marks.

This photo is looking straight down at the top of a panel, and the upper part in the photo is actually looking straight down at the sill.  This is to show the guide coat, and some sanding progress.  The left hand side has been sanded quite a bit, the right hand side only enough to show the brush marks that need to come out.


Even with four coats of primer and using the utmost care, it's so danged easy to sand through to bare wood!  Especially on corners and edges.

I'll have some touch-up to do before I can paint.  Plan to use Rustoleum rattle-can primer (which is compatible with this Schwartz primer) on the bare spots and some extremely careful sanding, probably with 600 grit.


This is the inside of the front panel and sill, pretty much ready for paint.  I have some more sanding at the upper edge, but that will all be done when the rest of the major sanding is done.


I had pretty much finished sanding the outside of the left seat riser, and had a couple of depressions where I couldn't sand away the guide coat, meaning they were a little deep.  So I stopped sanding and filled the spots with 3M Acryl-Green spot putty, a product that can be applied between coats of paint.  Unfortunately, as you can see, getting all the putty off got me down to wood.  There is also wood showing along the little ledge just under the repairs.


This is the stuff that works between coats of paint.


The area's been sprayed with a couple coats of Rustoleum sandable primer.  Will sand this back cautiously with 400 grit wet tomorrow.  Or later...


Sanding has really sped up since I started using 150 grit wet to level most of the brush strokes...at this point, I'm ready to go to 220 grit...

(click on images for more detail)


...until most of the guide coat is gone, and the 150 grit sanding scratches are smooth...


...Then finish up with 400 grit wet.

Right now I'm just trying to do the gross sanding.  Will do the delicate work around corners and edges later (so I can touch up all the bare spots all at once!)


Just for a little desperately needed gratification, I switched from sanding the inside of the panels to sanding the outside.  Ready to work off the last of the guide coat here...


And that's about as far as I got today.  LOTS of guide coat here to flat down.  If I can manage about an hour a day of sanding, I'll probably be ready to think about painting in a week or so.

Finished by Christmas? Probably not...


Thursday, November 6, 2014

Body Repairs Complete!


FINALLY!  After countless hours repairing, patching, fussing and SANDING, the carriage body is safe and sound at last, under its first coat of sanding primer.

Now I know the vehicle is going to be gorgeous in black, with a yellow gear.  It looks shiny here because the primer is still wet.  There will be at least three more coats of primer, with light sanding in between, then it's back to hours of wet sanding to prepare the surface for paint.  I am glad this carriage is so little!

I couldn't be more pleased with how all evidence of nicks, dings, chipped molding and cracks absolutely evaporated under this first coat of primer.

 Since I first began this job I absolutely DREADED working on the inside surfaces.  SO many corners to pick stuff out of!  I nearly opted to just give it an obligatory coat of primer and paint, but when you view the inside surfaces, every edge and every surface of the wood is FINISHED.  And nearly as much of the inside shows as on the outside.  There were just too many scars in the panels, and the grain of the oak framing was too prominent to do a sloppy job, especially after all this effort!  So everything on the inside that shows, got a treatment with filler.  In this case, since the blemishes and grain are all shallow enough, I used automotive spot putty/glazing compound, as I haven't found a wood filler that I like as well.  But even putting on the putty as thin as I could, I set myself up for hours of work, sanding it all back off!


These are the types of nicks and blemishes that showed up on the inside surfaces of the panels...scars from boots and baggage.  The putty has been sanded off the panel, but has not yet been sanded off the oak sill at the bottom.

Despite the many extra hours of sanding, the effort really paid off.  The heavy grained oak corner pillars already look smooth as glass.  The side panels at the front are just slightly convex on the inside, adding so much to the overall finish, and all the scars have been "healed".  It was so worth the effort!

When next we meet, I will have completed priming and sanding.  Then I will be setting up a clean painting area in the shop for applying the enamel coats, both to the body, AND to the seat that never got quite finished this summer!

Wednesday, October 29, 2014

Panel Crack Repairs and Final Body Stripping and Repair

Even as I was trying to contact the owner to buy this carriage originally, I wondered if I had the endurance to restore it.

But in my mind, the worst is over.  The worst part, stripping the paint, was a nightmare because instead of "lifting" the old paint in rippled sheets like I'm used to, the paint stripper turned it into a gummy, sticky glue that had to be ground off the scrapers occasionally with the wire wheel on the bench grinder.


Some areas were much more easily stripped with heat, as shown in a video in my last post.  But the molding and the entire inside of the body had to be chemically stripped.


I was just as happy that the floorboards were not salvageable...


...as that meant I could install a shiny new set.  These boards require some hand fitting around the edges.  I had to ORDER slot head wood screws to install them, because I cannot find them locally.  Everything is Phillips head.


Once the paint was off, it was a matter of going over the entire body with 80 grit sandpaper and marking areas that needed repair.  Other than the crack in the left seat riser (the right side has already been repaired), most repairs consisted of fixing blemishes, like the "skinned" molding on the bottom front, left side.


Pettit's marine epoxy fairing compound did a fabulous job on these blemishes and I have high expectations as to the permanence of the repair.  The stuff is really great to sand and molded beautifully.


There were only four screw heads to fill, and I did my best to clean the heads off as well as possible to insure adhesion.  Random nail holes in the seat frame were drilled out a little to get to clean wood, and also filled with fairing compound.  These nails held in a makeshift tool box under the seat and as far as I'm concerned they're vandalism!


The left rear corner was the only place where I felt some "structural" repair was required, and I believe it may have been a mismatch when the carriage was originally built...the only one in a gloriously beautiful job.  I do not believe this slightly "opened" joint was due to shrinkage.  I wanted to join the two panels in this corner permanently (the space had been filled with lead paste, which is why I think it was a built-in flaw), so instead of fairing compound, I used Abatron products.  A wood sliver wouldn't "go" because there was a network of small nails that would have prevented a good fit.  Again, I have high expectations of repair performance.

The crack in the seat riser was too close to the underside of the seat frame to be able to center a backing strip in this area (it was more accessible throughout the rest of the crack, so the backing strip was used in those places.)

I did a "lamination" repair in this crack, first cleaning it out, then laminating two strips of hardwood veneer into the crack with expanding (moisture curing) glue.  Roughness was evened out with fairing compound.  You cannot feel this repair with your fingers.  Unlike the crack on the right side, the two edges had not moved out of alignment, so did not have to be pulled back together.

Interestingly, I read in the George Isles restoration book that panels like this, which have been tapered (the seat riser is tapered from 3/8" near the crack, to 5/8" at the top) was a prime area for cracks to appear, even when the best materials were used by the best workmen in the best houses.

The first time I did a laminated repair like this was about three years ago, on the hubs of a European carriage.  Those cracks have never re-opened.

Once the repairs were completed, the body was sanded again, several times, with finer grit sandpaper, ending up with 220 grit.

It is now resting safely under a coating of clear penetrating sealer, awaiting the next phase, more sanding, priming, and painting!

In the meantime...


The Carriage Museum of America has most graciously consented to letting me excerpt a few passages and sketches from their book Conservation and Restoration of Horse-Drawn Vehicles,
published in 1997.

I am very sad to say that I do not find this book in their bookstore, nor do I find it in the Carriage Assn. of America's bookstore.  There was no mention of it being out of print.  Neither do I find George Isles' book, The Restoration of Carriages.  This is really alarming.  We really ARE running out of written guides for the restoration of carriages.  If you can find either or both of these books, BUY THEM if you are interested in restoring carriages.

Anyway, in the matter of panel repair, the Carriage Museum offers several options that I haven't had to experiment with on this project because damage to the vehicle was so minimal.

Cabinet Maker's Paneling:  Sometimes known as Baltic Birch or Finland Birch, it is a popular substitute for replacing solid wood panels.  There is too much information here for me to copy.  Perhaps if you are interested, you can search the internet for more information.

Veneering or Skinning:  Another choice in dealing with cracked panels is to use a veneer and glue it over the entire panel that is cracked.  This is probably an option for some jobs when you do not want to take the whole carriage apart in order to get to a panel to replace it.  The veneer can be a number of things, thin aluminum sheeting, Formica, fiberglass and resin.  Suggested is to get to the back of the panel to secure it from any further contracting and expanding (as I have done with the seat riser cracks).  Grind about a 1 1/2" wide surface on either side of the crack with coarse sandpaper and glue a 3" strip over the crack.

Repairing Panels by Inlaid:  You can try routing a half inch wide groove on both sides of the crack, about 1/3 the thickness of your panel and glue in strips of wood that are cut to fit the grooves.  Yet another way is to cut a simple V-shaped grove, fit and glue in a strip of wood.

There is a great deal more detail on panel repair in both the aforementioned books.  Neither deals in depth with other types of materials such as the Abatron and Pettit products of which I am so fond.  Panel cracks can be frustrating to repair permanently.  Just remember whatever you do, clean the surface of the wood, removing a sliver if you have to, to assure proper adhesion of whatever products (glue, putty, fiberglass) that you apply.


Tuesday, October 21, 2014

Heat Stripping Old Paint

CAUTION!  Wear protective equipment!  Eyewear, gloves, respirator.  Do as I say, not as I do!  :o)

Today, we're using a small torch to remove old paint from a carriage body panel.


The panel was finished up by stripping the molding with chemical stripper, mainly because I don't have a scraper that is effective on the round molding.


And here you can see the long crack in the left hand seat riser that needs to be fixed.

Tuesday, October 14, 2014

Panel Repair 1

Hooray hooray!  The wheels are home from the wheelwright!  The only wood that needed replacement was the felloes (wooden rims) of one rear wheel.  Apparently someone had tried to weld the iron tire/channel on in place and incinerated the ends of both felloes. Sadly, the original wood was otherwise sound.  With that, the steel channel that encircles the wooden felloes (shrunk on with heat to bind the wheels together) was replaced on all four wheels as well as new hard rubber tires all the way around (for the non-carriage driving readers, many buggy wheels had hard rubber tires in the 1800's!)

The original rubber tires had just sort of melted into a puddle where the carriage sat, and all the steel channels were in danger of rusting and disintegrating (one did!), yet the wood endured.

Since I hate "doing" wheels, they will probably be the last part of the carriage to be repainted.  In the meantime, all the bare wood has received a coat of penetrating sealer, and all the bare steel has been coated with Penetrol, a paint additive that doubles as an anti-corrosion treatment for metal.  They are back on their axles, and jacked up off the ground for the present.  Home, safe and sound!

The next job is to refurbish the carriage body, and the first task is to trace this design, which I may or may not ever attempt to reproduce.

I did discover that this paint job is not original, so while the design is very pretty, nothing is holding me to reproducing it.

I want to prepare the body for paint, so that once I get my little paint booth set up, I can do both the body and the seat, which is still waiting for me to put an acceptable coat of paint on.


I traced the design on vellum tracing paper (it was very faint), rolled the tracings up and set them aside.

Time to strip the paint.


I began that task with a small hand held torch and the job went beautifully, until I tried to clean around the moldings.  I ended up using chemical paint stripper and it was GROSS.  The paint came off as a tarry slime, but it did come off.

I am so concerned about leaving the wood unprotected that I am only doing one side at a time.  I'll strip, repair and seal this side before I proceed.

This may be an unfounded concern, but why take a chance?


The right side of the body is stripped and I can only marvel at the lovely condition of the wood, and the subtleties of workmanship that are beginning to appear.  The body is screwed and the screw heads are perfectly covered with wooden plugs.  There was no telltale mark in the paint to give them away.

The wood is carved in subtle ways that a casual observer would never appreciate.  This is the part I dearly love about renovating carriages.  The further I get into this restoration, the more I come to love the little vehicle.

The inside front surface of this panel (the right hand side of the photo is the front of the body) has been delicately convexed.  The "rail" between the "seat riser" (the upper part that the seat is mounted to) is created by carving it into the panel.  The seat riser itself starts out thin at the base of the rail, then widens steadily upward.  You would never notice this lovely subtlety unless you were looking dead on at the panel from the rear, with the seat removed.  All the corner pillars are concaved and scalloped, the seat pillars are rounded and carved so as to widen gracefully toward the top. The curved oak bottom sills are beautifully radiused.  Such a lovely little piece of furniture!


The inside of this panel is now stripped, and this is a photo of the seat riser, flanked by its pillars, and at the top, the oak framing member that supports the seat.  Through the center you see the greatest flaw in the body, a horizontal crack through the panel that goes from one end of the seat riser to the other.  This crack is just above the "rail" that appears to divide the body and seat riser.  This is what I need to fix.

My first task will be to stabilize the crack, and make sure the panel is firmly and permanently drawn together, in an attempt to keep the repair from simply breaking out.  Fixing a cracked panel is very frequently unsuccessful, so all I can do is hope that my procedure produces a permanent repair.

An invisible repair, that is, stabilizing this crack, would most likely entail cutting and chiseling a groove all along the crack, then inlaying and glueing a strip of wood that fits precisely into the groove.  The inlay could then be sanded flush with the surrounding surface.  For some types of panel cracks, like, say, a sleigh dash, such a procedure might be mandatory, when the repair is going to be highly visible.  The whole length of the crack you see here will be hidden under the seat.

The panel is only about 3/8" thick in the cracked area, which wouldn't leave much material if trying to inlay a repair strip in the above manner.

What I ended up doing was cleaning the stripped surfaces thoroughly and sanding with 80 grit.  Using two part epoxy glue, I glued strips of 1/4" x 1-1/2" oak over the crack.  When it is time to do the cosmetic work on this panel, the small areas that will be somewhat visible will be blended and faired into the surrounding surface as best I can.

A very small section of the repair strip at each end of the panel, on the inside of the body, will show.  In the front, most of that will be obscured by a seat "fall", a small curtain that hangs down from the cushion, and in the rear, I believe that the repair will be overhung by the seat.  The truth is, the way I've chosen to stabilize the crack is going to show a little bit when the carriage is finished.  I simply haven't got the skills to make an invisible repair.

There is a similar crack on the other side of the carriage, and it will receive similar treatment.

I did notice some "wannabe" cracks at the front of the damaged panel which happily, my repair strip covered.

The little carriage body, bristling with clamps!  It is said that all glueing should be performed as early in the process as possible, to allow for shrinkage, etc.  Tomorrow, after the glue has set up, I'll deal with actually repairing the crack.  This part of the job was only to stabilize it and prevent it from moving.


Next Day... 


I had a great deal of indecision about what method to use to fill the crack.  However, when I went out today to commence repairs, I found that the epoxy glue I had used on the backing strips had intruded a fair way into the crack, leaving more of a "deep gouge" in the outer surface than a crack to fill.  The crack itself is very narrow.  I used a utility knife to carve a sliver of wood away from both edges of the crack to create a "new surface" and ended up filling the crack with Pettit EZ-Fair epoxy fairing compound.  Three hours later, the epoxy was cured enough to sand away the excess and this is what the repair looks like, viewed from the rear.  The wood is only about 3/8" thick where it is cracked.

Viewed from the front.  The fairing compound was used to build out the chipped end of this molding.

Note:  This is the type of repair the fairing compound is made for.  "Bondo," automotive body filler, is not.  The EZ-Fair can be applied up to 3/4" thick.

One nice thing about the EZ-Fair is that it is the consistency of paste wormer and flows perfectly through a common throwaway syringe. The crack was less accessible at the front and under the molding and I was able to squirt it in to the full depth of the crack and under the molding like using a mini-caulking gun.

Had the crack been wider, I'd have probably used something more like liquid epoxy and a wood filler of some sort.  There are so many different methods to fix cracks, and really, only time will tell which repairs will be permanent.  Wood has a tendency to "move", especially once it's reached the stage where it's actually cracked.  Repair materials don't move at the same rate, if at all.  It wouldn't surprise me if over time, this crack remained fixed, but the panel cracked somewhere above it.  I hope not!


And a shot from the side.  The seat riser and repair have been sanded with 100 grit dry.  Tomorrow I have the actual pleasure of going over the nearly flawless panel with a fine toothed comb, looking for wounds that need to be faired.  100 grit to remove any remaining paint, 150 grit, then probably bounce up to 220.  Then a coat of penetrating sealer to protect this panel while I attack the other side!


Friday, September 12, 2014

Paint

 I am going to finish up this part of the blog by saying that I came very close to my goal.  But I have given myself permission to quit obsessing over this project and get back to my normal life for awhile, whatever that is.  This photo shows the present status of the seat...upper seat back with a gloss coat of enamel, side panels and lower seat back sanded and ready for same.  The sanded coat is the third coat of enamel that was allowed to remain. Perhaps as many as six coats were washed off with solvent before they dried.

This pretty shiny surface does not hold up in the light of day.  Because the lighting was poor when I painted, and because the painting area cannot be made dust proof, the surface actually has an irregular gloss and a lot of dust in it.

Shortly after this photo was taken we had a wind storm and the inside of my painting tent looked like a tornado had blown through.  That was the end of the project for now.  Fortunately, nothing will be harmed by allowing the paint to cure before being "flatted down" again and recoated.  The important thing is that the wood is all wonderfully protected.

Happily, I learned a great deal about the paint, what I should expect to see with each coat, sanding, brushes, light and the all-consuming need to control dust.  I will share with you what I have learned.

So, what happens next, after I get my fill of riding and driving my neglected horses and catching up on all the heavy yard work and house work that have been neglected as this little wooden crate has dominated my every waking hour this summer!

I am going to prepare the body for paint.  That will be the next phase of this blog.

I will move the painting into the shop, which will have improved lighting and a "clean room" enclosed in clear plastic, with filtered air.

I will buy a different paint brush.  The one I am using tended to "split" and force me to work an area of fresh paint more than was good for the finish. I think that is where I got into trouble with the areas of faded gloss.

I will resume the painting project with considerably more confidence!

So here's my experience!

***********

Carnation Milk is the best in the lan'
Comes to the table in a little red can.
No teats to pull, no hay to pitch,
Just punch a hole in the sonofabitch!

That silly old advertising jingle pretty much sums up my understanding of paint until a few days ago.  I took my expensive paint, dipped in my expensive brush, brushed the paint on my meticulously prepared surface and ended up wiping off three consecutive coats before they could dry.  The results were hideous!  Brush marks and runs, no matter how carefully I applied the paint.  Time to retreat into the information packed halls of the internet.

When one is spraying modern automotive paints - which we are not - there are precise formulas to follow when combining ingredients to prepare the paint for spraying.  In brush painting, we do not have "instructions" to follow, so to speak.

As it turns out, the expensive paint may not be ready for brush painting right out of the can, just as Carnation evaporated milk isn't exactly the same thing as whole cow's milk.

The paint usually has several methods of application; brush, roller,"roll and tip", airless spray, conventional spray.  The manufacturer has no control over the method used for application, the surface to which it will be applied, or the expected results.  Nor does he have control over the conditions of atmosphere under which the paint is applied. So he offers a product that can be adapted to suit the requirements of the painter.  That generally means thinning.  Yes!  Even for brushing!

I always thought that thick paint, the way it generally comes out of the can, meant that it had enough substance to flow out into a smooth coat.  I don't know how many times that incorrect assumption caused paint failure for me.  The instructions always say to apply several thin coats, and I always try to put that paint on in the thinnest coat possible, but it usually doesn't work well, even on a horizontal surface that's been sanded as smooth as glass.

There is more.  Modern environmental laws and regulations specify limits as to how much VOC - volatile organic compound - that paints can contain.  VOCs are solvents that evaporate into the air.  Sufficient solvent is required for the paint to flow out correctly.  But your paint may not have enough solvent to give you the glassy surface you seek on your carriage!

You will see a notation on the label stating the VOC content,or you can look it up on the Material Safety Data Sheet available from the manufacturer.  You may see a warning that adding solvent will increase the VOC.  As a consumer, I have been uninformed about the relevance of that.  In simple language, it means that there may not be enough solvent for proper paint flow out, and if I add more, I may actually be breaking the law!

Further, the manufacturer's instructions may allow you to "add up to 10% solvent" for brushing or "10-15%" for spraying.

Translation:  That is all you can add to keep the product VOC within legal limits.  It has nothing whatever to do with paint performance.

Since we do not have a "tech sheet" to guide us beyond this wilderness marker, we need to gain experience with our chosen paint and various thinners/reducers which MUST be compatible with the paint.

Take no chances! Use the thinner recommended by the manufacturer!  Some explanation of common thinners:

When conditions are cool and damp, we may want a thinner that will dry faster, so it won't take a full day for the paint to become dry to the touch!


Naptha can usually be used, as it dries a little faster than ordinary paint thinner.  In some cases, "Japan drier" can be added sparingly.  It is an additive that I believe, causes catalytic (chemical reaction) drying, but it can make paint brittle.

For slower drying, I think plain mineral spirits or paint thinner can be used.  You would want slower drying on hot days because the paint may dry too fast for you to control it.  Your brush will get sticky and the paint won't flow out.

At any rate, I am guessing that in order for a thin coat of paint to flow onto your carefully prepared surface, it should virtually have no brush marks in it as you lay it on.  Don't take that as gospel from an experienced painter,but that pretty much paraphrases a passage from one of my coachpainting books. It seems that after this recent experience, that is just about what the thing needs to look like as you are working, and that very well may mean thinning your particular paint with a suitable thinner.

Pettit offers a "brushing thinner" and a "spraying thinner".  I believe the spraying thinner dries much faster.

Following the paint can instructions can sometimes guide you in thinner selection, but you are somewhat on your own when determining how much, if any, thinner you are going to add to your paint.  Experience is your friend. The paint needs to be thin enough to lay on perfectly, but not so thin that the pigments are diluted too much.  You need good coverage. Whether you are within legal VOC limits when you are done is none of my business.

When I finally arrived at the earth shattering epiphany that I needed to thin the paint in order to achieve proper flow-out, I started with one half ounce of Pettit brushing thinner to five ounces of Pettit EasyPoxy paint.  I painted part of the carriage seat with that and was ecstatic with the results, but I didn't feel it was just right yet, so I added another half teaspoon of brushing thinner to my remaining paint.  It reduced the slight brush strokes by at least 50%.

Ultimately, for the seat back above, I came up with a mixture of 4 1/2 ounces EasyPoxy, 1/2 ounce Penetrol (which may dilute the pigments, but adds shine and adhesion and improves flow-out) and 1/2 ounce Pettit brushing thinner.  I got gorgeous flow-out with this, and good coverage, but my light was poor enough to be difficult to see the black surface well, and my paint brush was splitting, leading to missed spots which had to be gone over too many times, and some of which remained in the final film.

This is pretty much where the thread ends for now.  But here are some photos of the process, and some comments.


Before the main event, while the wet-sanded exterior of the seat was drying, I took the opportunity to put a coat of enamel on the inside of the seat.  A great shot of what *no* surface preparation looks like after painting. Very rustic.  This will of course, all be covered with upholstery.  But all surfaces of the seat are now protected.


My first coat of paint, while it was still wet, was enough to bring a normally mature, rational adult female to a state of sniveling self pity!  I had sanded the guide coat off the primer with 220 grit wet sandpaper.

I KNEW that 220 grit sandpaper was too rough!  But it was several grits finer than the manufacturer's 150 grit. If you double click on the photo you will see that the surface is anything but glassy.

NOW...much wiser than when I took this picture, I realize a number of facts that were unavailable to me before.  The first is that with meticulous surface preparation, it is likely very unnecessary to use a "high build" primer as I have on the seat.  The seat surface was nearly perfect before I proceeded to prime.

When the guide coat was all sanded off, what I could not see is that the surface was still a bit far from level.  That, and the visible sanding scratches in the paint made me feel like a failure.  But actually, what I was seeing wasn't all such a bad thing.

It was just the first coat of paint, and the first coat of paint needs a rough surface to grab on to, so although I still think 220 is awfully coarse, it provided the necessary roughness for the enamel to grab on to.

The dark gray of Schwartz sanding primer is quite a bit easier to see when the primer coat is level, so that should be a help when I prepare the body for paint.

Back to the first coat of paint.

As the paint dried, it did an amazing job of leveling, and didn't look half as bad as when it was wet.  So I felt a lot better.


Here is a macro of the surface.  I'm sharing these pics so that first-time painters will know what to expect.  Look at the sanding scratches that have "photographed through" to spoil the shine.  Nothing could be more graphic to demonstrate the need for a perfectly prepared surface!  You can double click on any of these images to get a closer view.

The speckles of dust are very difficult for me, or anyone, to eliminate, as I do not have a dust-free environment.  Right now I have an air ionizer going in the tent to try to help eliminate some of the dust, but it is very breezy and hot outside today, so it wouldn't be a good day to paint.

Now, for comparison, here is a singletree that I painted a day later, with its first coat of the same paint!

The difference is the primer and the sanding.

For the seat, I used a heavy bodied, "high-build" primer (Pettit) and sanded it back "level" with 220 grit sandpaper.

On the singletree, I used a less heavy bodied, hard drying sanding primer (Schwartz).  I sanded it back part way with 220 grit, then finished with 400 grit.  The first coat came out nearly flawless.  All coats of primer and paint were brushed.  The difference is in the primer and the sand paper.

Now!  The rest of the carriage comes down to primer selection.  After seeing the results of my first coat of enamel on the heavy, high-build primer, I had to ask myself, with all the laborious surface preparation that preceded the first coat of paint, why did I elect to use a "high-build" primer in the first place?  There were no defects to fill!

The only answer seems to be, it seemed like the right choice at the time! For now, it looks like I will be leaning more toward using the Schwartz sanding primer for the rest of the body.  I expect no further need for high-build products, particularly since the wood on the body is so beautifully preserved.

And even now, it doesn't pose a problem.  We sand between coats of paint anyway.  The seat, in its present state, just poses a little bit more work.


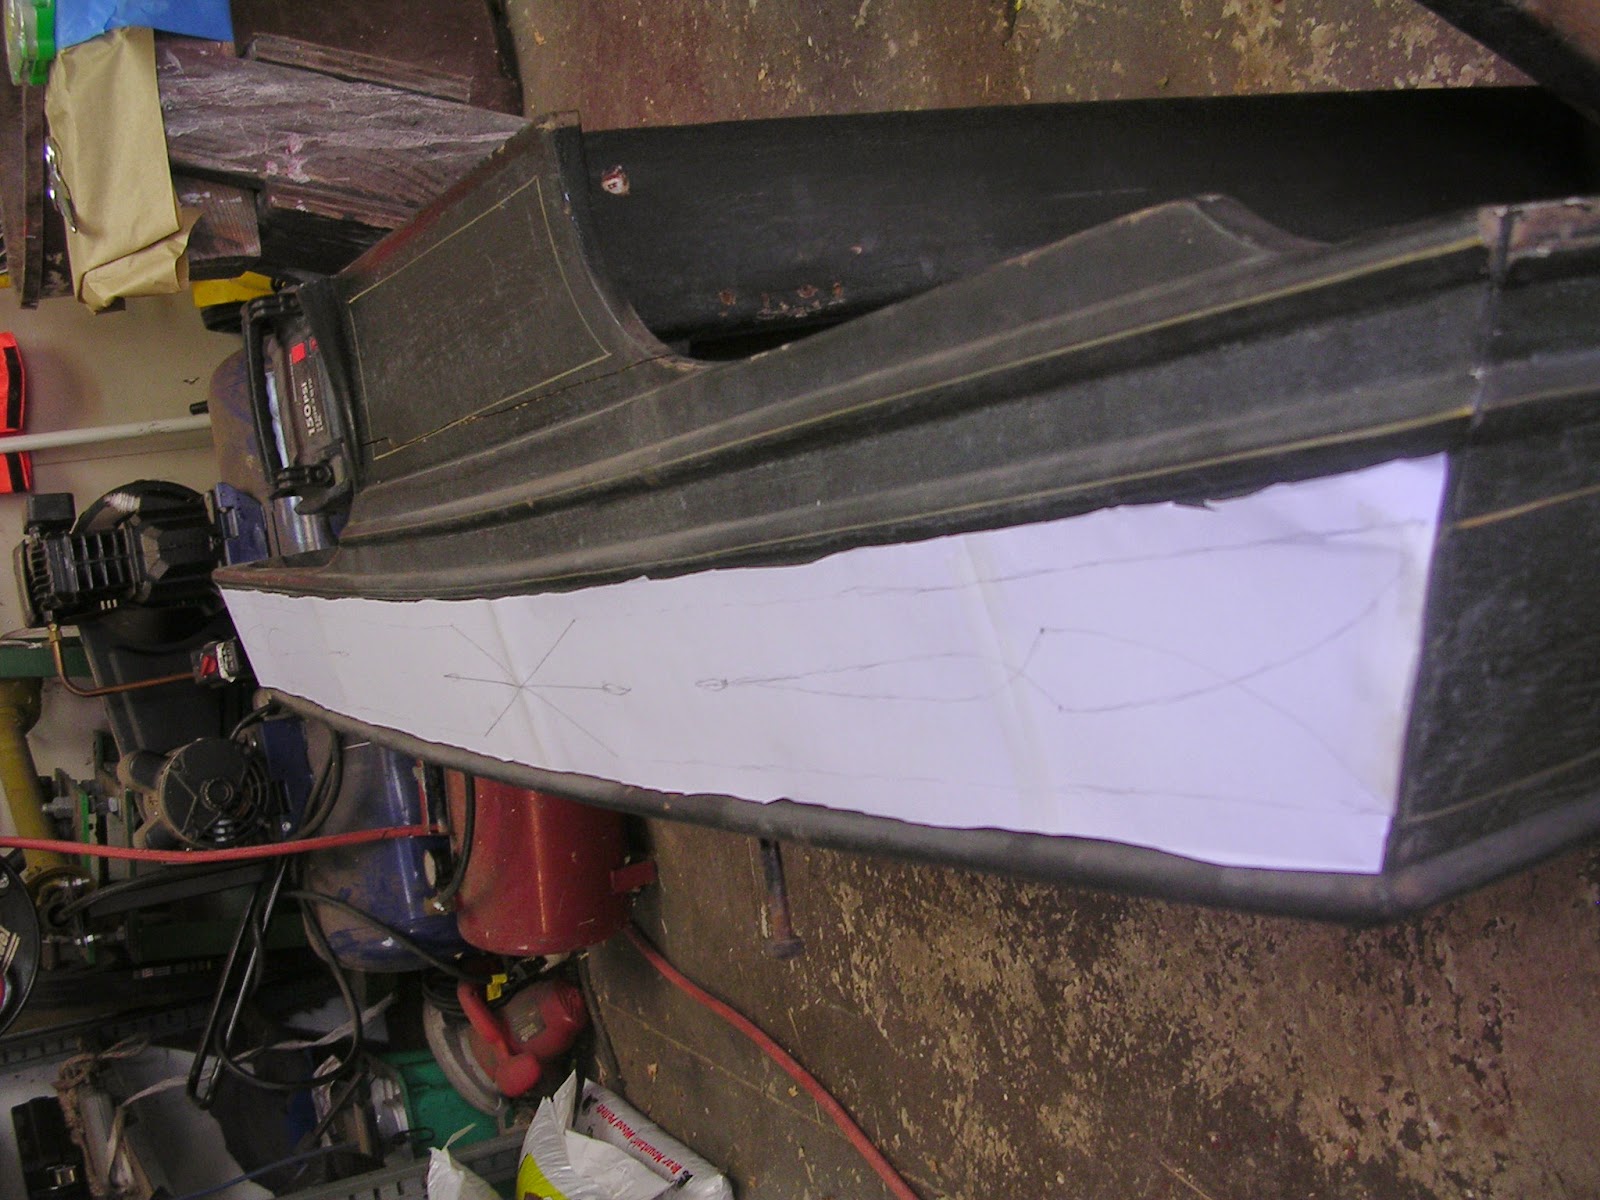
And so once again, the little carriage seat is trotted outdoors into my shady sanding place.  Ugh.  This shows that the "guide coat trick" is not foolproof.  Especially with white primer!  At least with the dark Schwartz primer you can really see the results of your sanding!

So here, I've taken a few careful strops with 400 grit wet sandpaper, and immediately, we can see why our first coat of paint came out so dismally dull.

Once again, these brush marks and dust must be sanded out completely before the next coat is applied or they will be WORSE! Happily, these defects are now quite shallow and sanding is considerably easier.

IMPORTANT TIP!!  Just putting on more paint will NOT solve the problems shown here.  Adding paint to a surface like this will only make it WORSE!  Like cutting a board twice and discovering it's still too short!  Or adding more saddle pads under a too-narrow saddle to try to make it fit a wide horse. Defects in the surface must be leveled by sanding or the quality of the job will just continue to deteriorate.

IMPORTANT TIP NUMBER TWO!!  It's going to take at least 24 hours in good weather for your paint to be dry enough to sand!  If your sandpaper clogs up easily while you are wet-sanding, STOP and wait for the paint to dry another day or so, believe me if you don't, you will be sorry!  The paint will roll up in sticky wads on the surface and it will be practically impossible to get them off!  If you have big, thick drips, you may want to shave the surface off with a razor blade to allow the paint underneath to dry.


(Following was written as "stream of thought)

An hour or so of light but thorough wet sanding with 400 grit paper yielded a really nice, smooth surface.  Yes, I cut through to primer in a couple of places, but that's not a problem!  There were a couple of almost-drips that were a little too soft yet to sand well, so those will be last minute touch-ups before Coat Number Two.  Today, it's too hot and windy to paint.  Hopefully tomorrow.

And yes, of course, learning to use a paint gun would eliminate 90% of the labor.  But not everyone can buy a big enough air compressor and a paint gun.  And the number of problems an inexperienced person can create with a modern spray gun and a traditional paint is mind boggling. I really want to stress that you can do a great job of painting with just a brush, if you have the patience to do all the necessary sanding.

Sanding got easier on the enamel, because the surface lumps and bumps (basically, the primer and the poorly-flowing paint) became fainter and fainter.

I ended up sanding what I thought would be my last time, with 600 grit sandpaper, as 400 grit was still showing sanding scratches.

 When I painted this time, I ran into problems trying to "control" the paint in the hot, dry weather, and even once I found my "magic formula" I wiped off coat after coat of wet paint because things would begin to go wrong, the brush would drag, and I would panic.

At one point I did a beautiful job on the seat back, and while it was still tacky, I made a horrible mess of the lower part of the seat.  I carefully solvent-wiped all the wet paint off the bottom half, and in the process, the cotton rag rained lint all over the tacky seat back! So that all had to be wiped off again, and it was nearly too late!

So!  That is why the upper seat back is painted, and the bottom is sanded as I end this part of the blog.  I learned not to be greedy and try for too much all at once.  I got that upper seat back painted on a good day and QUIT.  A couple of days later when I wanted to try for the bottom part, the wind had turned my painting tent topsy-turvy.  I was so fed up, I finally said QUIT, BARB!  BEFORE YOU REALLY SCREW UP!!  REST, BUILD A BETTER PAINT BOOTH, GET A NEW BRUSH, AND OPTIMIZE YOUR CHANCES FOR SUCCESS INSTEAD OF BLUNDERING THROUGH.

Happily, most carriages come with handy, built-in "sections". One need not get the whole thing painted in one day, and as beginners, learning to control the paint mix, the application and the brush, it might be best to stop for the day when you're ahead, instead of experiencing such heartbreaks as I described above.

And so, my friendly readers, I will leave you alone for awhile.  I'll pick up again with carriage body repairs, new priming, sanding and painting strategies.  Thank you for sharing my adventure with me!


Saturday, September 6, 2014

Body Off!

While waiting for the hot, windy weather to moderate before continuing the painting of the carriage seat, I was seized by the urge to dive into another dirty, tedious, boring task!

So out I went to lift the little carriage body off the gear!

Thankfully, some farsighted carriage builder of the past painted the shanks of the bolts that held the body to the bolsters (the large wooden blocks between the body and the springs) so that they released the body with only a feeble fight. No corrosion welding the wood and the bolts together!

In those "famous last words", there appears to be very little repair to be done to the body.  Here I am pointing to a long shrinkage crack in one of the seat risers (the part that the carriage seat is bolted to) which must be repaired.


And here is its matching crack on the other side.


One of the first jobs is to get rid of this hack job of a tool box under the seat.  When I first saw it, with random nails everywhere, and those split up end pieces, I thought how am I EVER going to repair this?!  Then I realized it was a careless add-on.  The ends look to be made from the same piece of wood from which the repair panel in the seat was made!

There probably WAS a tool box under the seat before the seat was repaired.  Like most buggy seats, the bottom seat frame has a large opening for a "hatch door" to access lap robes, tools, etc. stored in a little wooden box underneath. 

I found the old screw holes where the seat had originally been mounted.  Since there are no corresponding holes in the present seat frame, that suggests a major repair to the seat!  New seat boards.  And as I suspected, the original seat was held on with only four screws, not seven!  So more little wee bits of history revealed.

There is no rot in the floorboards, but they're all badly split and will be replaced.


Cosmetic damage from unknown hardware.


The only corner that seems to need a little repair.


And just the usual signs of wear and tear.


 As is typical, the body could be removed from the gear by removing four nuts.

My first really good look at the side-spring gear.  I am not really familiar with side-spring carriages.  This gear has no wooden "reach" connecting front and rear axles, but rather these apparent extensions of the springs, forming "outriggers" from the centers of the springs to the rear axles.  It is certainly NOT a Concord wagon gear (which I already knew, but the side springs and body style make it look a lot LIKE a Concord wagon).

These "outriggers" are tied in with the springs at the center bolt.


And this "wishbone", tying the fifth wheel at the center front axle to the springs, also layers into the springs leaves.


I always thought that the carriage body had a slightly lop-sided appearance and blamed it on the blocks that the axles are sitting on.  But, oh no!  Can you pick it out?  The near bolster is a full 3/4" shorter in height than the off bolster!  It is also made of two pieces of wood, where the off bolster is one single piece!  What tattle-tale of a wreck have we here!!  There are also unused bolt holes at the front of each bolster, suggesting that something was re-drilled at some point.  I'll worry about what to do with the problem later.

There are bolts going through the bolsters into the cross braces that appear to be "sprung" or at least twisted hard to fit existing holes in the metal.  These refused to release the bolsters from the gear.  Again, something I'll worry about when I tear down the gear.

My winter project!  I am still waiting for the wheels to come back from the wheelwright.  But it looks like I'm definitely NOT going anywhere in this carriage for awhile anyway!