Saturday, March 21, 2015

A Tale of Carriage Restoration

This post is dedicated to all of you who have a wonderful restoration project at hand, and have suddenly discovered what a monumental task it seems to be!  Take heart!  You can do this!  And here's proof that an ordinary girl with a minimal amount of talent and a few tools can produce a restored carriage that will bring you joy for the rest of your life!

This is the story of a certain Australian "jinker" that found its way to the western shores of the United States.

Now, the term "jinker" is familiar in the state of Victoria (where sometimes it is known as a "Mallee jinker"), but in other parts of the country, such as New South Wales, the vehicle is correctly termed "sulky".  Obviously it has no similarity at all to an American "sulky".  Common to the jinker/sulky vehicle are "Dennett" springs, a comfortable seat which shifts easily with the turn of a small crank (for balance), and a degree of artistry that varies from pretty details to real drama.    This little jinker is in the "pretty details" category, and the wood components of the vehicle, including the "LaTrobe" seat, were available in kit form.

This carriage was in the possession of a lovely lady who had acquired it free, along with another vehicle in much better condition, at an auction.  It was in such bad shape that it was just thrown in with the other vehicle.  Professional restorers scoffed at it (to me, after I acquired it) and it was in danger of becoming a lawn ornament.

During a visit to Victoria at the turn of the 21st century, I was introduced to this lady, and I expressed such great interest in the vehicle that she gave it to me!  All I had to do was figure out how to get it home!

This gift unleashed a flurry of frenzied activity!
We located an exporter in Castlemaine who was actually familiar with exporting carriages, and he directed us to a crating firm in Kangaroo Flats.  We hired a flatbed trailer, and hooked it to the back of Jim Sweeney's ute, shown in the background of this photo.  Jim had already gone to prodigious effort to be at that particular place, at that particular time, and now we had a bit of mad driving to do to meet some unremembered deadline to get it to the packer!

Here we are at the packer, with wheels removed for crating.  But the drama doesn't end here.

We had to CUT THOSE LONG SHAFTS OFF way back at the body and throw them away!

NO WORRIES!  They were junk anyway!

Thus began the 22,000 mile ocean voyage of the little jinker on its way to Long Beach, California, and thence up to Portland, Oregon.

Two months later, the vehicle arrived and reality set in.  The vehicle really WAS  a wreck!  Someone had savaged all the wood work with a sharp instrument, scarring it deeply, all over!
One of the steps was missing, a critical part that also serves as bracing at the front of the vehicle.

This particular photo shows the hand-forged replacement, that came at quite a dear price!

The AXLE was not original, and the WHEELS, were shot, which didn't matter, because they didn't fit the axle anyway!

The wooden mud guards were gone.  The cast treads on the shafts were gone.  The lamp brackets were gone, and CERTAINLY the lamps were gone!  The wooden mud guards were gone.  The seat boards were rotted.

But the spirit of the thing lived on, and I saw absolutely NOTHING on the vehicle that I couldn't fix, or have fixed!

I will not bore you with all the details of the restoration.  I just want you to know that virtually NOTHING is insurmountable in your carriage restoration project!  In this photo, I have lined up a new pair of shafts from Witmer Coach shop with various original parts, such as the "span iron" (the support for the rear transverse spring), the original seat risers (luscious dark wood!) and some other components just to "see".  I later spent hours and hours with hand tools, a spoke shave, a belt sander, and a Sure-Form, putting a crown on the new shafts to match the old, and even carved in the simple scroll at the ends of the shafts to match the originals.

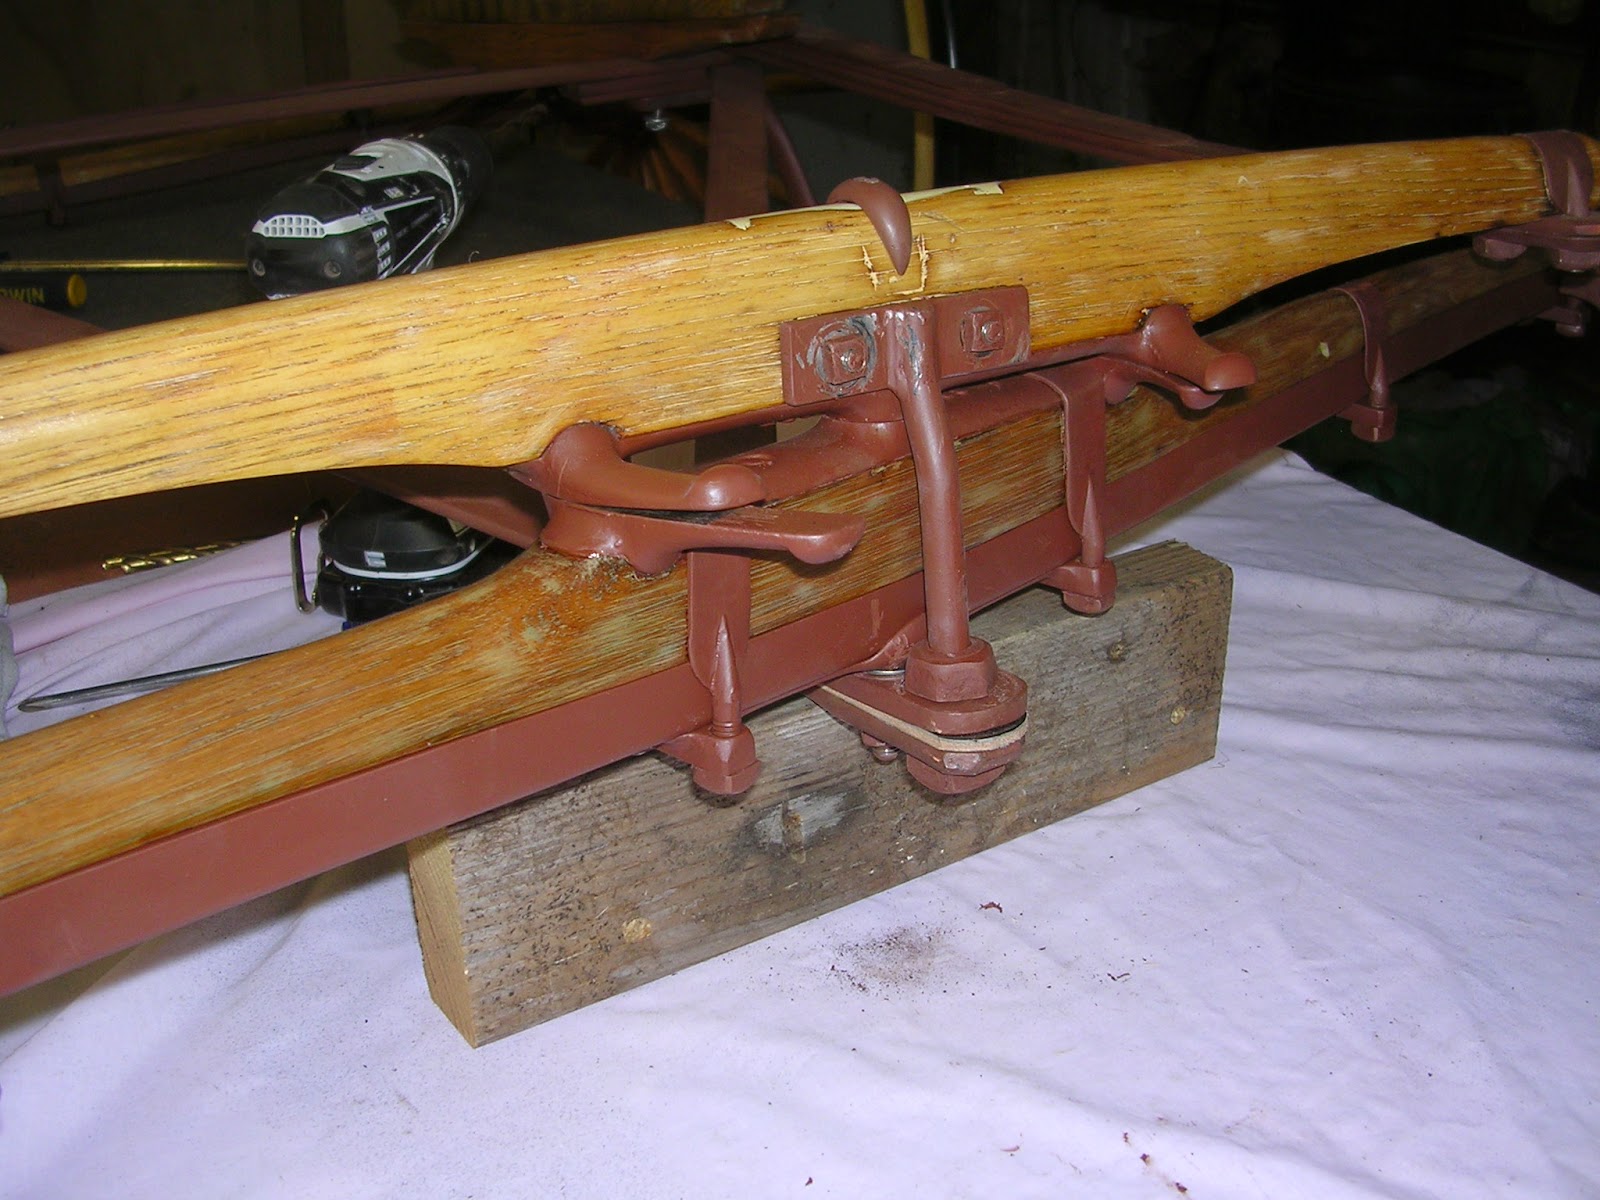
I made new seat boards with a cheap router and more hand tools.  I repaired cracks - some successfully, some not so much.  I had stress cracks in the old ironwork welded up.

I bought it a new roller bearing axle and put a set of freshly tightened wheels on it, that I happened to have on hand.

I bought new mud guards and a singletree from Witmer.


I learned how to upholster from a funky video tape (this is my first button job)


And in a surprisingly short period of time, this was the result!  A thing of beauty and a joy forever!


Today, 12 years later, it's now a bit of an "older restoration" and it shows a little road rash from its new career as a recreational driving vehicle.  It floats over rough ground and rides like a cloud!  And never has there been a suggestion of weakness.

So take heart, fellow carriage restorers!  You too will see the completion of your project and will be able to enjoy the pride of your accomplishment, not to mention HOURS of wonderful driving, for years to come!


Sunday, March 8, 2015

Will I Get to Drive It on my Birthday?

It all depends on whether a handful of stainless steel fasteners arrives by then!


My goodness, it got big all of a sudden!

The wheels are FINALLY fully sanded and sealed, fitted with new leather washers, and slid onto freshly greased axles!

The shafts have been fitted onto the front axle and all the nuts have been tightened securely.  The fifth wheel has been lightly oiled.


The little body came out of storage and got her new floorboards installed, and her freshly re-covered dashboard mounted...


Her "nine cent whip socket" is attached to the dash.  The whip socket was the very first thing on the carriage to be restored.


Her new floorboards are screwed into place...


And the seat is put on!


And happy times...there's enough room on the underside of the seat to mount a pair of lamp brackets!

Just need a few new bolts and screws for the final assembly, and yippee!  One quick spin around the block before it all goes back into storage, awaiting warm weather for painting!

The only thing standing between me and a birthday drive is...when will those fasteners arrive and...yes, this is surely the one thing that will end our gorgeous weather and bring the rain back!


Wednesday, March 4, 2015

Front Axle Assembly

While there is still some sanding to be done on the wheels, the front axle assembly represents the last of the truly filthy cleanup work to be done to the carriage.


Starting with the spring bar.  I chose to strip the paint off the spring bar with chemical stripper.  I tried the torch, but there was a different sort of primer on the spring bar which resisted heat. And, I was concerned about burning the delicate scroll ends of the spring bar with the torch.


I filled the damage caused by the T-head king bolt with Pettit's EZ-Fair marine epoxy fairing compound.  Look at that lovely wedding ring head on the new king bolt!


Next, everything, including the upper half of the fifth wheel (which is still attached) gets smeared with automotive spot putty. Makes a great grain filler and repairs small nicks.

I chose to leave the upper fifth wheel half attached to the spring bar because it is held on with several screws, all of which would be virtually impossible to extract.  I could not identify a single reason to take it off.


The spot putty dries quickly and sands easily, leaving a surface that should require no further filling prior to painting.  The wood receives a coat of Pettit's Clear Wood Sealer and the metal fifth wheel plate receives a couple of coats of primer.  When dry, the spring bar will be ready to bolt up to the springs.


The two little carriage bolts that hold the perch bolt to the front of the spring bar are extracted, cleaned up, pronounced near perfect condition.


The spring bar is mounted!  Oh! It is NOT attached to the end of the wishbone, just the long springs at each end.


The Front Axle


The very, very, very LAST part of the carriage to be stripped of paint, the axle cap (sometimes called axle bed) held one more little pleasant surprise for me.  Just before I could wipe the paint stripper away completely, the original black paint, with brilliant yellow stripe, was revealed! I had suspected the gear was originally black, here was finally proof.  The evidence of yellow striping was frosting on the cake! This photo shows the last remaining speck of yellow fine lining.

Well, I may be reversing the color scheme, black striping on yellow gear, but  apparently the original owner and I had something of the same taste!


Oookaay, count down! The brown bar in front of the spring bar is the steel axle.  All its parts have been stripped and cleaned in the usual manner.  And yes, Houston Hay made this axle too!


The wooden axle cap (also called axle bed) has been stripped, cleaned, patched, filled, sealed and primed in the usual manner and placed on top of the steel axle, aligning the king bolt holes...


Ironed up...now, WILL IT GO BACK ON?

In order to get it on, I have to elevate the spring bar and push the end of the wishbone down, tip the king bolt sleeve on the axle into the rear hole of the wishbone and hope like heck that the king bolt holes in the spring bar, various pieces of hardware and the axle line up with the holes in the overlapping ends of the wishbone!  I don't for one minute believe I'll get that lucky!


However...it plopped right into place!  Just like that!


And most amazing of all - or perhaps not, given the talent of the blacksmith who did the work - the new perch bolt mated right up with its two mounting holes in the spring bar, and the holes in the ends of the wishbone.

The gear is DONE.


Just to torment myself one last little bit, I fitted the bolsters back onto the springs.  They were BEASTLY to take off, and beastly to get back on...particularly the one at the bottom of the picture.  It is no longer so beastly.  Since they have to come off again for painting, I cleaned up the fit and made them easier to get off and on.


And that, dear friends and fellow carriage enthusiasts, is IT, for the time being. I still have some tweaking and touch up, and two wheels to finish sanding, but nothing blogworthy.

The little carriage is all repaired and stabilized and will go back under a shroud until painting weather.  I hope you'll join me again then!  Thank you all for sharing this adventure with me!